How to Stop Rust on Truck Frame: A Step-by-Step Guide
A practical DIY guide to stop rust on a truck frame, from inspection and rust removal to coatings and maintenance. Learn techniques, safety, and preventive strategies for a durable, rust-free frame.

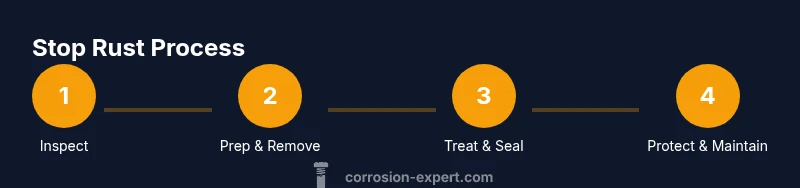
This quick guide shows you how to stop rust on a truck frame with a practical, step-by-step approach: inspect the frame for deep corrosion, remove loose rust, treat the metal with a rust converter, seal with epoxy primer, and finish with a durable rust-proof topcoat. Then establish ongoing maintenance to prevent recurrence.
Why rust on a truck frame happens and why it matters
Rust on a truck frame is more than a cosmetic issue; it can compromise structural integrity, reduce load capacity, and shorten the vehicle’s lifespan. According to Corrosion Expert, frame corrosion begins when protective coatings fail and moisture, road salt, and dirt seep into seams and crevices. As rust progresses, pits form, steel thins, and critical mounting points weaken. The result can be unpredictable handling, louder road noise, and costly repairs. Early detection is key, especially in high-salt regions or areas with heavy winter driving. Regular visual inspections of frame rails, crossmembers, weld seams, hangers, and suspension mounts after winter or off-road use will help you catch early signs before costly damage arises.
Understanding how rust forms helps you pick the most effective treatment path. In many cases, success hinges on a layered approach: mechanical cleaning to remove loose corrosion, a chemical rust converter to stabilize the metal, a durable primer, and a robust protective coating. The goal is not only to stop existing rust but to create a barrier that prevents reoccurrence. Non-abrasive rust removers are useful for light surface rust, while heavier rust requires mechanical removal. The combination of proper prep, chemistry, and coating thickness yields the best long-term outcome.
Assessing the extent of rust and preparing the frame
Cleaning and mechanical rust removal techniques
Applying rust converter and treating the metal
Sealing with epoxy primer and rust-proof topcoat
Underbody protection: coatings, sealants, and layering strategies
Maintenance plan to prevent recurrence
Safety, disposal, and environmental considerations
Common mistakes and troubleshooting
Tools & Materials
- PPE: nitrile gloves, safety glasses, and an respirator or dust mask(Essential for protection from rust particles, dust, and fumes)
- Wire brush or wire wheel attachment(Use with a drill or grinder for heavy rust areas)
- Angle grinder or rotary tool(For heavy rust; select a medium to coarse wheel)
- Degreaser/solvent(Prep surfaces by removing oil, grease, and road grime)
- Rust converter product(Chemically converts rust to a stable, water-stable compound)
- Epoxy primer(Two-part epoxy primers provide a durable base)
- Rust-inhibiting topcoat/underbody coating(Choose weather-resistant, UV-stable coatings)
- Masking tape and plastic drop cloths(Contain overspray and protect nearby components)
- Metal filler or epoxy putty (optional)(Use only for repairing pits deeper than 1-2 mm)
- Rags or lint-free wipes(For cleaning and quick-drying solvent removal)
- Sandpaper and sanding blocks (80-120 grit)(Key for creating a rough profile for adhesion)
- Shop vacuum or air compressor with nozzle(Helps remove dust and debris from confined spaces)
Steps
Estimated time: 6-10 hours
- 1
Inspect frame and identify problem areas
Begin with a thorough visual inspection of the frame rails, crossmembers, welds, and mounting points. Look for flaking paint, bubbling, deep pits, and rust through to bare metal. Map out high-risk zones such as the underbody, wheel wells, and suspension mounting points to prioritize treatment.
Tip: Document areas with photos and note the depth of corrosion to guide your next steps. - 2
Set up your workspace and safety gear
Clear the area, protect nearby components with masking, and ensure good ventilation if indoors. Put on PPE: gloves, eye protection, and a respirator. Lay down drop cloths and have a bucket of clean rags ready for quick wipe-downs between steps.
Tip: Ventilation is key to avoid inhaling rust dust and solvent fumes. - 3
Remove loose rust and scale
Use a wire brush or wire wheel to remove loose rust from the surface. For stubborn areas, use a grinder with a medium wheel but keep movements steady to avoid overheating the metal. Stop when the metal shows a clean, grey surface with no visible rust flakes.
Tip: Don’t rush; aggressive grinding can create heat-affected zones that promote cracking later. - 4
Clean and degrease the surface
Apply a degreaser to dissolve oil and road grime. Wipe with clean rags until the surface remains solvent-free. A clean surface is essential for the rust converter and primer to bond properly.
Tip: Work from the cleanest areas outward to avoid dragging contaminants back onto prepped zones. - 5
Apply rust converter to stabilized rust
Follow product directions to apply the rust converter to affected areas. The converter chemically converts iron oxide into a stable compound, reducing porosity and preparing the metal for sealing.
Tip: Apply evenly in thin coats; multiple light coats are better than a single heavy layer. - 6
Allow converter to cure before sealing
Let the converter cure for the recommended time. This ensures ongoing stabilization and minimizes the risk of pinholes or gas entrapment under coating.
Tip: Avoid touching or sealing while still tacky to prevent trapping solvents beneath the coating. - 7
Lightly sand and wipe ready for primer
Lightly abrade the converted surface to improve adhesion, then wipe away dust with a clean, dry cloth. The surface should feel rough to the touch but clean and dry.
Tip: If you see glossy areas, re-sand those spots to ensure even primer bonding. - 8
Apply epoxy primer
Mix and apply a thin even coat of epoxy primer to all prepped areas. A primer bed improves corrosion resistance and creates a uniform surface for the topcoat.
Tip: Maintain a consistent distance from the surface to avoid runs or sags. - 9
Apply first coat of rust-proof topcoat
Apply a first coat of rust-proof topcoat or underbody coating. Use long, smooth strokes and cover all susceptible surfaces, including inner rail cavities.
Tip: Two thin coats deliver better protection than one heavy coat. - 10
Apply second coat and seal seams
Wait the recommended recoat window, then apply a second coat. Seal all seams, welds, and joints where moisture could intrude, using a compatible sealant or coating.
Tip: Ensure seams and welds are fully covered to prevent moisture ingress. - 11
Cure and inspect
Allow coatings to cure per product instructions. Inspect for pinholes, missed spots, or glossy areas that indicate insufficient coverage. Touch up as needed.
Tip: Check in a shaded area if possible to avoid rapid drying in direct sun. - 12
Schedule ongoing maintenance
Create a maintenance plan: regular washes to remove salt, annual inspections, and reapplication of coatings as necessary. Documentation helps you track wear and plan refresh intervals.
Tip: Set reminders for seasonal inspections to stay ahead of future rust.
Quick Answers
What is the best rust treatment order for a truck frame?
Start with a controlled inspection, remove loose rust, degrease the surface, apply a rust converter to stabilized rust, cure, then apply epoxy primer and a topcoat. End with an underbody coating for protection.
Begin with inspection, then remove rust, treat with converter, cure, prime, and seal with a protective coating.
Can I paint over active rust on a truck frame?
Active rust should not be painted over. Remove as much rust as possible, treat with a converter to stabilize, and then apply a primer before topcoat.
Don’t paint over active rust—stabilize first, then seal with primer and topcoat.
Do I need to remove all rust before applying primer?
You don’t have to remove every speck, but you should remove loose rust and scale and ensure a clean, profile-rich surface for primer to bond.
Make sure the surface is clean and not flaking to ensure good primer adhesion.
How long does rust treatment last on a truck frame?
Durability depends on coating quality, maintenance, and environment. A well-applied system with regular maintenance can extend protection, but expect to recoat every few years in harsh conditions.
With proper care, expect several years of protection, but recoat when signs of wear appear.
Is an undercoating essential after rust treatment?
Undercoating provides an extra moisture barrier and helps protect from road spray. It’s highly recommended, especially for vulnerable areas.
Undercoating adds protection against moisture and debris after rust treatment.
Are safety concerns important when applying rust products?
Yes. Follow product directions, wear PPE, and ensure good ventilation. Dispose of waste properly according to local rules.
Wear protection and work in a well-ventilated area to stay safe while treating rust.
Watch Video
Quick Summary
- Inspect early and plan a layered treatment.
- Use rust converter only on stabilized rust (not active rust on bare metal).
- Seal with epoxy primer and a durable topcoat for lasting protection.
- Maintain a routine that includes washing and annual inspections.
- Document processes and product cure times for future touch-ups.