Fix Rust Spots on Cars: A Complete Step-by-Step Guide
Learn how to fix rust spots on your car with a clear, safe, step-by-step approach. Diagnose, prep, treat, prime, and repaint to prevent further corrosion while preserving your vehicle’s finish and value.

By following this guide, you’ll fix a rust spot on your car and protect the metal against further corrosion. Start by assessing the extent of damage, then remove loose rust, apply a rust converter if needed, sand smooth, and prime, paint, and clear-coat to match your factory finish. Safety goggles and proper ventilation are essential.
Why fix rust spot car issues matter
Rust spots are more than a cosmetic blemish—they’re an ongoing source of corrosion that can undermine a car’s longevity. If you want to fix rust spot car, addressing the issue early reduces the chance that rust will penetrate through the panel. By taking a careful approach, you restore the surface and slow future damage. According to Corrosion Expert, a methodical repair that combines rust removal, sealing, priming, and repainting can preserve the metal and keep your paint looking uniform. In practice, you’ll first assess how deep the rust goes, then decide whether you can repair the spot with DIY tools or if professional help is warranted. The goal is to stop the cycle of oxidation, prevent moisture from entering, and maintain the vehicle’s value. With the right steps and safety practices, a small rust spot can be transformed into a durable, nearly invisible repair that lasts years.
Assess the extent of the rust and safety before you start
Before you reach for sandpaper, take a careful look at how far the corrosion has spread. Surface rust that sits on top paint is easier to remove than rust that has penetrated deeper or bubbled the panel. Tap tests with a plastic tool can help distinguish between a shallow discoloration and real metal loss. If you hear a hollow sound or see wrinkling, treat the area as more than a quick fix. Wear PPE: safety glasses, gloves, and a dust mask to protect from rust particles and chemicals. Work in a well-ventilated space and keep a metal bucket or tray handy for waste. Cleaning the area with soap and water removes grime that can sabotage adhesion later. Remember, the goal is to precisely define the repair zone so you don’t muss adjacent paint, trim, or body lines. This is also the moment to consider if rust is present behind trim or under seals that may complicate the fix.
Tools and materials you will need
Gather a focused set of tools and supplies before you start. Essential items are marked as required to ensure a durable repair:
- Wire brush or drill with a wire brush attachment — required; used to remove loose rust and create a clean edge.
- Sandpaper assortment (80, 120, 400, 600 grit) — required; for rust removal and feathering edges.
- Safety equipment: safety glasses, gloves, dust mask — required; protects eyes, skin, and lungs.
- Rust converter (optional for light rust) — recommended when rust has just begun; it converts iron oxide to a stable compound.
- Primer designed for automotive use — required; helps paint adhere and prevents rust bleed.
- Automotive touch-up paint or color-matched base coat — required; matches the vehicle’s color.
- Clear coat — required; seals the finish and adds UV protection.
- Masking tape and masking film — required; protects surrounding paint.
- Clean cloths, isopropyl alcohol, and a mild cleaner — required; prepares the surface for adhesion.
Optional but helpful: body filler for larger imperfections; a dual-action sander for professionals.
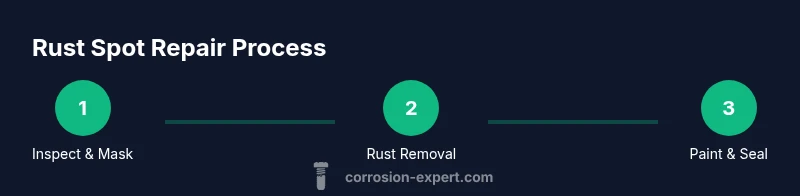
Step-by-step repair approach overview
A structured repair keeps the work predictable and durable. Start with a clear repair zone, remove corrosion, treat the base metal, and finalize with protective coatings. For best results, you’ll align the process with the car’s existing finish and UV exposure. This overview maps to the detailed steps in the next section, but you can use it as a quick reference for planning, especially if you’re new to DIY bodywork. The key concepts are containment of dust, defined edges, and consistent material thickness. If you’re unsure about how deep the rust goes, err on the side of conservative repair to avoid over- or under-treatment. Following Corrosion Expert guidance, limit blending to the affected area to maintain color match and avoid distortion of door edges or panels.
How to prevent rust return after repair
Preventing a recurrence is as important as removing the existing rust. After you complete the repair, seal the area with a high-quality primer and color-matched paint, then finish with a clear coat that resists UV and moisture. Regularly cleaning and drying the area helps prevent moisture buildup, which can fuel future corrosion. Park in a covered area when possible and consider applying a corrosion inhibitor to vulnerable joints and seams. If you drive in winter months or coastal environments, periodic re-inspection of the repaired spot is prudent to catch early signs of re-oxidation.
Troubleshooting common issues
If the repaired area starts to peel or shows new rust after a few weeks, re-check your surface prep, ensure you used compatible primers and paints, and confirm there was no hidden rust behind trim. Adhesion failures often come from oils or waxes left on metal, or from applying layers that are too thick. In cases of severe rust where metal has corroded through, a professional repair may be the safer option. Always re-check color match under natural light to detect shade differences and adjust with light coats as needed.
Tools & Materials
- Safety glasses(ANSI Z87.1 compliant; eye protection against grit)
- Gloves(Nitrile or work gloves for hand protection)
- Dust mask or respirator(P100 or N95 rated; protects from particles and fumes)
- Wire brush or drill attachment(Coarse brush for removing loose rust)
- Sandpaper (80, 120, 400, 600 grit)(Feather edges and smooth surface)
- Rust converter (optional for light rust)(Converts rust to a stable compound; follow product instructions)
- Automotive primer(Oil- or water-based; suited for metal surfaces)
- Color-matched automotive paint(Match to factory color or use a close color blend)
- Clear coat(UV-resistant; provides gloss and protection)
- Masking tape and masking film(Hold-edge protection to prevent overspray)
- Isopropyl alcohol and clean cloths(Prep surface to ensure good adhesion)
- Body filler (optional for larger imperfections)(Use only if you need to level a recessed area)
- Dual-action sander (optional for professionals)(Speeds up feathering and smoothing)
Steps
Estimated time: 60-120 minutes active; 24 hours cure time for final paint and coatings
- 1
Inspect the rust spot and determine scope
Carefully inspect the area to decide if rust is surface-level or has penetrated deeper. Use a plastic scraper to test adhesion and look for bubbling or soft edges. If you hear a hollow sound or see visible holes, plan for a more extensive repair.
Tip: Take precise measurements of the affected area and photograph it before you start. - 2
Mask surrounding surfaces and prepare the area
Cover adjacent paint with masking tape and film. Clean the area with a mild detergent to remove oils and dirt that can hinder adhesion. Ensure ventilation and keep your workspace free of flammables when using solvents.
Tip: Mask beyond the edges of the rust to protect nearby paint from overspray. - 3
Remove loose rust and feather the edge
Use a wire brush and 80–120 grit sandpaper to remove loose rust and create a clean, defined edge. Do not gouge bare metal; feather the transition to healthy paint. Wipe the area with isopropyl alcohol after brushing.
Tip: Work in short sessions to avoid overheating the metal or creating deep scratches. - 4
Treat remaining rust with converter (if applicable)
If only light rust remains, apply a rust converter per product directions. It chemically converts oxide into a stable layer that primes the surface for painting. Allow the converter to cure before sanding.
Tip: Test a small area first to confirm compatibility with your primer. - 5
Feather and clean, then prime
Sand the area with 400–600 grit until smooth and free of scratches. Wipe again with alcohol, then apply a light, even coat of automotive primer. Let each coat dry per the product instructions.
Tip: Apply multiple thin coats instead of a single heavy coat for better adhesion. - 6
Apply color and clear coat
Spray color-matched base coats in light, even layers. Allow each layer to dry before applying the next. Finish with a clear coat to protect against UV and moisture; cure according to the manufacturer’s guidelines.
Tip: Keep the spray at a steady distance and sweep evenly to avoid sags. - 7
Cure, polish, and evaluate
Let the paint cure fully in a dust-free environment. Once dry, lightly polish the area to blend with surrounding paint and restore gloss. Inspect for color match and edge stability; touch up if needed.
Tip: Avoid washing or exposing the repair to moisture for the recommended cure period.
Quick Answers
Is rust on a car expensive to fix?
Costs vary with the extent of corrosion. Small surface rust can be DIY-friendly and inexpensive, while deep rust that has damaged structural metal may require professional repair and replacement parts.
Costs depend on how deep the rust goes; small spots are DIY-friendly, larger issues may need a pro.
Can you fix rust spots yourself at home?
Yes, for small, surface rust spots you can complete a repair with basic tools and materials. More extensive rust behind panels or seams usually requires professional attention. Always follow safety guidelines.
DIY is possible for small spots; larger problems should be evaluated by a pro.
What is rust converter and do I need it?
Rust converter neutralizes rust and converts it into a stable layer. It’s helpful on light surface rust, but for deeper corrosion you’ll still need primer and paint after conversion.
Rust converters are useful for light rust but don’t replace primer and paint.
How long does it take to complete the fix?
Active repair typically takes about an hour or two, with additional time needed for paint to cure. Full cure can extend to 24 hours or more before the vehicle is fully ready for regular use.
Expect an hour or two of work, plus time for paint to cure.
What safety steps are essential?
Always wear eye protection, gloves, and a mask. Work in a ventilated area and follow product directions for solvents and paints to minimize fumes and skin exposure.
Wear protection and ventilate the area to stay safe.
Will the repair match the original paint?
Color matching is usually close but not perfect, especially on metallics or pearls. Tangible results depend on proper color matching, paint quality, and careful blending.
A near-perfect match is usually achievable with good prep and blending.
Watch Video
Quick Summary
- Assess rust depth before starting work
- Protect surrounding paint with proper masking
- Use thin coats for primer and paint
- Allow adequate cure time for durability
- Aim for a color match that blends with nearby panels