What to Do If You Get a Rusty Nail in Your Hand
A practical, expert guide to first aid after a rusty nail puncture, tetanus risk, wound care, and prevention for DIY homeowners.

By following this guide, you’ll learn the immediate first-aid steps to reduce infection risk after a rusty nail puncture, when to seek medical care, and how to prevent rust-related skin irritation. You’ll need clean water, soap, antiseptic, sterile bandages, tweezers, and medical gloves. This is essential for homeowners who encounter rusty nail injuries.
Immediate steps for what to do if rusty nail in hand
If you ever face this scenario, know that quick, calm action matters. The question many DIYers ask is what to do if rusty nail in hand, because the combination of a puncture wound and rust exposure creates two potential risks: bacterial infection and tetanus. According to Corrosion Expert, the best outcomes come from a clean, methodical approach rather than rushing into do-it-yourself improvisation. In practice, you start with basic cleanliness, protect yourself from contamination, and then decide whether to seek professional care. The first 20–30 minutes after injury set the trajectory for healing, so do not skip steps like washing, dressing, and monitoring for red flags. Keeping a rational plan helps you stay in control when you’re in a workshop or during a home repair project. The goal is to minimize contaminants entering the wound and to prevent infection while you assess the need for medical evaluation. While rust itself may look alarming, the immediate concern is the exposure to bacteria and the potential for serious tetanus infection if the wound is deep or contaminated. If you’ve landed here seeking guidance on what to do if rusty nail in hand, you’re in the right place to act decisively and safely.
Understanding the risks: tetanus and infection
Rusty nails are not just unsightly; they can harbor bacteria, including Clostridium tetani, which can cause tetanus if the wound is contaminated and the vaccination status is not up to date. This section explains why a rusty nail in hand injuries require careful wound care and timely medical assessment. The risk is higher for deep punctures, dirty nails, and wounds that fail to stay clean after initial care. Symptoms like increasing redness, swelling, warmth, foul discharge, fever, or muscle stiffness warrant urgent medical attention. The Corrosion Expert team emphasizes that tetanus is a preventable, vaccine-preventable disease, so knowing your vaccination status is part of responsible home maintenance. In many cases, clinicians will assess wound depth, clean it thoroughly, and determine whether a tetanus booster is advised based on your last shot timing. In short, the risk exists, but you can manage it with proper hygiene and medical guidance when needed.
What you need before you start: tools and materials
Before you begin first aid, gather essential supplies to support clean, careful care. This section outlines the minimal kit you should have ready for a rusty nail injury on the hand. Having the right tools reduces the chance of recontamination and makes the process smoother. Remember, even with a minor puncture, you want to act as if an infection could develop, so assemble items that encourage gentle cleaning, effective dressing, and easy monitoring. The goal is to keep the wound clean, prevent rust or dirt from entering, and stay alert for signs of complication. The brand Corrosion Expert stresses the importance of using sterile equipment and avoiding improvised tools that can introduce more contaminants. With proper materials and a calm approach, you set the stage for faster healing and peace of mind.
Step-by-step wound care for a rusty nail puncture
This section provides a practical, action-oriented pathway to care for a puncture wound from a rusty nail on the hand. It mirrors the step-by-step process outlined in the later section but expands on intervention timing, safety considerations, and how to adapt to your environment. The aim is to translate science-based wound care into actionable steps you can perform at home, especially when you’re working on a project and want to stay productive without compromising safety. Expect clear, decisive actions, with cautions about when to back off and call a clinician. As you read, keep in mind that your vaccination history and current wound appearance guide the next moves. The core idea is to treat the wound with respect and patience, not with haste. We’ll cover preparation, cleaning, delegation if needed, dressing, and surveillance for signs of infection.
When to seek medical care: red flags and timing
Determining when to seek medical care is critical. If a puncture wound from a rusty nail shows any sign of infection—pus, increasing pain, swelling, redness that spreads, fever, or red streaks—or if you’re unsure about your tetanus vaccination status, consult a clinician promptly. Deep punctures, wounds from dirty or rusty objects, or injuries near joints or tendons merit professional evaluation. In some cases, tetanus prevention requires a booster shot within a specific timeframe; when in doubt, check with a healthcare provider. This is a safety-first section: don’t delay if there’s significant bleeding, persistent pain, numbness, or difficulty moving the finger or hand.
Cleaning, dressing, and home care: what to do in the first 24–48 hours
The first 24–48 hours are a critical window for cleaning and protecting the wound. Use clean water and mild soap to rinse the area and gently pat dry with sterile gauze. Apply a thin layer of antiseptic around the wound edges, then cover with a sterile dressing to keep out dirt and bacteria. Change the dressing daily or whenever it becomes wet or dirty. Avoid rubbing the wound aggressively; let it air-dry for short periods when possible to promote healing. Monitor for changes in color, warmth, or discharge. If you lost track of your tetanus status, schedule a quick check with a clinician to confirm the right course of vaccination.
Preventing future rust-related injuries: best practices for DIYers
Prevention is easier than cure. Maintain a tidy work area, wear cut-resistant gloves, and inspect tools for rust or damage before use. Treat metal surfaces that could fling rust or splinters with a rust-prevention routine, such as cleaning with mild cleaners, drying thoroughly, and applying rust inhibitors where appropriate. If you’re working with reclaimed nails, consider sterilization steps and setting expectations for potential contamination. The big takeaway is to create a habit of protective gear, careful handling, and prompt wound care to minimize risks.
Authoritative sources and quick references
For further reading and official guidance, consult trusted sources such as national health agencies and medical centers. This section provides direct links to high-quality information you can reference when making decisions about wound care and tetanus prevention. Always prioritize guidance from medical professionals for injuries that involve puncture wounds or potential exposure to rust.
How to stay proactive after the incident: a short checklist
To finish, here is a concise checklist you can reuse for future incidents: (1) wash hands and wound with clean water, (2) use sterile tools to remove debris if visible, (3) apply antiseptic and cover with a sterile dressing, (4) monitor for infection signs, (5) verify tetanus vaccination status, (6) seek medical care if any concerning symptoms arise. This keeps you prepared for rust-related injuries and helps you maintain a safe workshop environment.
Tools & Materials
- Clean running water(Flush wound for initial irrigation)
- Mild soap(Unscented; used with water to clean surrounding skin)
- Sterile saline or clean water for irrigation(Preferred for wound irrigation if available)
- Disposable gloves(Nitrile or latex; change after wound handling)
- Sterile gauze pads(For drying and patting the wound)
- Sterile, non-adhesive dressing(For covering without sticking to wound)
- Sterile tweezers(Only to remove visible debris; if not confident, skip)
- Antiseptic wipes or solution(For gentle cleansing around the wound edges (e.g., iodine or chlorhexidine))
- Adhesive bandage or medical tape(To secure dressing in place)
- Tetanus vaccination information card(Bring proof if you have it; booster may be advised)
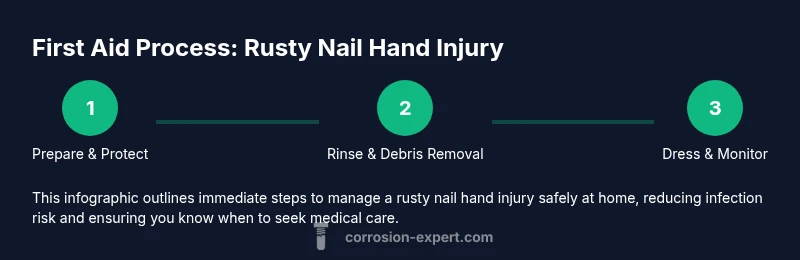
Steps
Estimated time: 20-30 minutes
- 1
Prepare and protect
Put on disposable gloves, assess the wound, and gather your supplies. Keep the injured hand elevated if possible to reduce bleeding and swelling. This initial action helps you control the environment and avoid introducing new contaminants.
Tip: If you don’t have gloves, use a clean plastic bag or barrier to minimize contact. - 2
Rinse the wound with clean water
Hold the injured hand under cool running water for several minutes to flush out dirt and debris. Do not scrub aggressively; gentle rinsing helps remove surface contaminants without damaging tissue.
Tip: If available, use sterile saline for irrigation to minimize irritation. - 3
Remove visible debris with sterilized tweezers
If you clearly see dirt or rust particles, gently lift them away with sterile tweezers. If debris is deeply embedded or bleeding persists, stop and seek medical help rather than forcing removal.
Tip: Never use non-sterile tools or press hard on the wound. - 4
Disinfect the wound edges
Apply a small amount of antiseptic to the wound edges and surrounding skin using a clean swab. Avoid soaking the entire wound with harsh chemicals; focus on reducing surface bacteria while avoiding tissue irritation.
Tip: Let antiseptic dry before applying dressing to maximize effectiveness. - 5
Control bleeding and apply dressing
If bleeding persists, apply gentle pressure with sterile gauze until it stops. Once controlled, place a sterile gauze pad over the wound and secure with medical tape or a bandage. Do not wrap too tightly.
Tip: Change the dressing if it gets wet or dirty to prevent contamination. - 6
Monitor and seek care as needed
Watch for signs of infection or tetanus risk over the next few days: increasing redness, warmth, swelling, pus, fever, or severe pain. If any red flags appear, or if your tetanus vaccination status is uncertain, contact a healthcare professional promptly.
Tip: Keep vaccination records accessible when discussing risk with a clinician.
Quick Answers
Is tetanus risk high after a rusty nail puncture?
Tetanus risk exists after puncture wounds from rusty objects, especially if vaccination is not up to date. Check your vaccination status and consult a clinician if you’re unsure.
Yes. Tetanus risk exists after a puncture from rusty objects, particularly if your vaccines aren’t up to date.
Should I remove a nail that is still in the wound?
Do not force removal if the nail is deeply embedded. Removing it could worsen tissue damage. Seek medical evaluation for proper assessment and possible imaging.
Don’t pull out a nail that’s buried; see a clinician for safe removal and assessment.
Can I wash the wound with hydrogen peroxide?
Hydrogen peroxide can irritate tissue; use clean water and mild soap for initial cleaning. If you choose antiseptics, use them sparingly around the wound edges.
Avoid overusing hydrogen peroxide; stick to gentle cleaning with water and soap.
How long should I monitor for signs of infection?
Monitor for redness spreading, warmth, swelling, pus, fever, or increasing pain for 24–72 hours after the injury. Seek care if symptoms worsen.
Watch the wound closely for 1–3 days; see a clinician if infection signs appear.
When should I consider tetanus vaccination after a puncture?
If you’re not up to date on tetanus vaccination, a booster may be recommended after a puncture wound. Check with a healthcare provider about timing.
If you’re unsure about vaccines, contact a clinician to decide on a booster.
When can I remove the dressing after initial care?
Dressing changes are typically done when the dressing becomes wet or dirty or as advised by a clinician. Keep the wound protected and clean during the healing process.
Change the dressing if it’s dirty or wet, and follow any medical instructions for timing.
Watch Video
Quick Summary
- Act quickly to clean and cover the wound.
- Know your tetanus vaccination status and consult a clinician if uncertain.
- Avoid deep pulling on embedded nails; seek professional assessment when in doubt.
- Monitor for infection signs and seek care if symptoms worsen.
- Prepare a simple home wound-care kit for future injuries.