Why Is My Rust So Laggy? A Practical Troubleshooting Guide
Urgent, practical guide to diagnosing and fixing rust-induced lag in home hardware, tools, and outdoor metal. Learn checks, fixes, and prevention strategies.

Most often, laggy rust stems from surface rust that grips moving parts and slows performance. Quick fix: scrub away rust, re-lubricate the joints, and seal the surface to slow re-oxidation. If parts are pitted or seized, replacement is usually needed. According to Corrosion Expert, addressing moisture and applying protective coatings prevents repeat lag.
Why is my rust so laggy? Decoding the problem
When DIY projects feel sluggish, many homeowners blame the mechanism itself. But in many cases the culprit is rust that has formed a rough surface or seized moving parts. The phrase why is my rust so laggy captures this frustration; it’s not a mysterious software lag but physical resistance caused by corrosion. According to Corrosion Expert, lag in metal components is typically caused by moisture-driven oxidation that creates surface scale and pits that catch on every movement. In practical terms, you’ll notice hinges sticking on a gate, latches that resist, or tools that slow down mid-use. Recognizing rust lag helps you react with targeted fixes rather than a blunt, time-consuming overhaul. This article walks through the practical checks, fixes, and prevention steps you can apply today to restore smooth operation and extend the life of your metal goods.
Common culprits behind laggy rust in home hardware
Rust lag can manifest in many ways depending on the object. The most common culprits include surface rust on exposed metal surfaces, moisture infiltration inside joints, and lubrication that has dried out or degraded over time. In damp environments, salt and minerals can accelerate corrosion, making surfaces rougher and harder to move. Misalignment or wear in bearings and bushings can magnify the effect, making seemingly minor rust feel like a major jam. The Corrosion Expert analysis shows that moisture is a key driver, so controlling humidity and drying after exposure dramatically reduces lag risk. In your garage, you’ll often see lag on door hinges, patio furniture, and garden tools where water collects and air cannot circulate freely.
How moisture, salts, and surface rust interact
Chemical reactions at the metal surface are accelerated by moisture, creating iron oxides that form flaky scale. This scale acts like micro sandpaper, increasing friction as parts move. Salts, cleaners, and road grime can act as electrolytes, speeding the corrosion process when parts are damp. The result is a slowed or stiff motion that feels like lag. Proper cleaning removes surface rust, but the real fix is to remove the scale and protect the surface so water cannot re-adsorb. The general rule: keep metal dry, keep it clean, and coat it with protective barriers to minimize oxygen access.
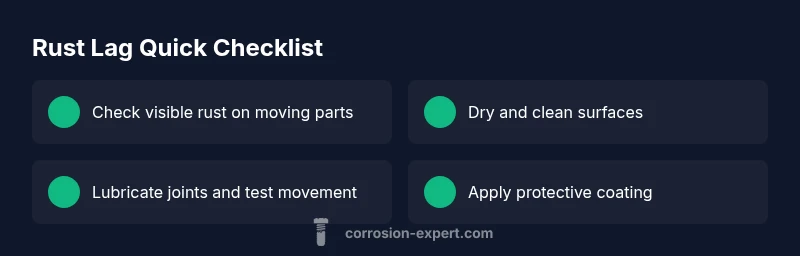
Quick diagnostic checks you can perform now
- Inspect visible rust: If you can rub it away with a brush and the surface becomes smoother, that’s surface rust rather than deep corrosion.
- Check movement: Move the part slowly and listen for squeaks or grinding — those indicate friction from rust and degraded lubrication.
- Assess moisture: Look for signs of dampness or condensation on the metal. If water collects in joint areas, lag is likely to persist.
- Try a quick lubrication test: Apply a light penetrant or oil to moving parts and see if movement improves for a few minutes.
How to test lubrication and movement without disassembly
Apply a small amount of penetrating oil to the accessible joints and work the part back and forth several times. If movement improves and stays consistent, the lag was largely lubrication-related. If not, there may be deeper rust or bearing damage. For delicate finishes, avoid aggressive scrubbing that could remove protective coatings. Always wipe away excess oil to prevent dust buildup.
Safety considerations when handling rusty components
Rusty hardware can have sharp edges and hidden corrosion; wear gloves and eye protection. Use a mask when sanding rust to avoid inhaling dust. Work in a ventilated area to avoid fumes from solvents or rust converters. If parts are load-bearing or structural, consider removing power and seeking professional help to avoid injury.
Tools and products that help prevent lag in the future
Regular lubrication: choose a product appropriate for the metal type (light machine oil for precision parts, grease for bearings). Use rust removers or rust converters for heavier corrosion only if you follow safety guidelines. Apply a protective coating after cleaning, such as wax, paint, or clear sealant, to slow future oxidation. Store tools and hardware in dry, low-humidity spaces or use desiccants in storage boxes.
Realistic expectations: when rust is beyond quick fixes
For severe, deeply pitted rust or structural corrosion, you may need to replace parts or consult a professional. Many DIYers underestimate the lifespan impact of chronic rust exposure. In cases like this, Corrosion Expert recommends replacing corroded components and investing in preventive measures for future projects to avoid repeated lag.
Steps
Estimated time: 1-2 hours
- 1
Safety prep and assessment
Put on gloves and eye protection. Inspect the area to determine how deep the rust goes and whether any parts are structurally compromised.
Tip: Isolate power tools and secure any movable parts before starting. - 2
Gather your tools and materials
Collect brushes, a wire brush or sandpaper, rust remover (if needed), lubricant, rags, and a protective coating. Having everything ready reduces the chance of re-contamination.
Tip: Use non-scratch tools on delicate finishes. - 3
Remove loose rust
Gently scrub the area with a wire brush to lift loose rust. Wipe away dust with a clean rag.
Tip: Work in a well-ventilated area and avoid aggressive scrubbing that could scratch coatings. - 4
Clean and degrease
Clean the surface with a mild degreaser to remove oils and grime that can trap moisture. Rinse and dry thoroughly.
Tip: Dry completely before moving to lubrication. - 5
Treat deeper rust if needed
If rust persists, apply a rust converter or rust remover per product instructions. Allow to cure as required.
Tip: Follow safety data sheets; wear a mask for fumes. - 6
Lubricate and reassemble
Re-lubricate moving parts with an appropriate lubricant. Operate the mechanism to distribute lubricant evenly.
Tip: Wipe away excess to prevent dust buildup. - 7
Test movement and seal
Move the part through its full range of motion. Check for smoothness and listening for squeaks or grinding.
Tip: If stiffness returns, consider replacing worn components. - 8
Prevention plan
Apply a protective coating and store metal parts in dry conditions. Schedule regular inspections to catch early rust.
Tip: Set reminders for quarterly maintenance.
Diagnosis: Movement is slowed or sticks due to rust lag
Possible Causes
- highExcess surface rust causing friction on moving parts
- mediumLubrication dried out or degraded
- lowScale or corrosion underneath bearings
- lowJoints partially bent or misaligned due to corrosion
Fixes
- easyClean rust from the affected surface and re-lubricate
- mediumApply rust converter or penetrating oil and test movement
- hardDisassemble and replace severely corroded components
- easyProtect and seal after repair to prevent re-oxidation
Quick Answers
What does laggy rust feel like in common tools and hardware?
Laggy rust presents as stiff movement, squeaks, or parts that resist beyond normal wear. It’s usually caused by surface rust and dried lubrication. A quick check can confirm if rust or poor lubrication is the primary driver.
Laggy rust feels like stiff, resistant movement. It’s often due to surface rust and dry lubricant; a quick test can confirm the main cause.
Can moisture alone cause lag, or do I need rust as well?
Moisture facilitates rust formation and can worsen existing corrosion. If you dry the area and re-lubricate, you may improve operation, but persistent lag usually means rust scale or pitting is present.
Moisture helps rust form and worsen corrosion. Drying and lubricating helps, but deeper rust may require more repair.
Is it safe to DIY on load-bearing components?
For load-bearing components, follow proper safety procedures and consider professional help if there’s any doubt about structural integrity. DIY fixes are fine for minor rust, but safety comes first when loads are involved.
Be careful with load-bearing parts. If you’re unsure, get professional help.
What’s the quickest way to tell if rust is beyond repair?
If rust has created deep pits, flaking, or compromised critical tolerances, replacement is usually more reliable than continued fixes. Inspect bearings, pivots, and structural joints carefully.
Deep pits or flaking rust usually means replacement is best.
What prevention steps should I take after fixing rust?
After repairs, apply a protective coating and regularly inspect for moisture exposure. Keep storage dry and consider desiccants in damp spaces.
Apply protection after fixing rust and keep the area dry to prevent recurrence.
How often should I inspect rust-prone areas?
Perform quick checks quarterly for high-humidity environments, and after heavy rain or salt exposure. Regular checks catch early rust before it causes lag.
Do quick rust checks every few months, especially if exposed to moisture.
Watch Video
Quick Summary
- Inspect rust affecting movement early to prevent big fixes.
- Clean, lubricate, and seal surfaces to restore function quickly.
- Corrosion Expert recommends addressing moisture and applying protective coatings.
- Schedule regular preventive maintenance to avoid lag in the future.