How to Use Rust Converter Brush On: A DIY Guide
Learn how to use a brush-on rust converter for quick rust stabilization, surface prep, and paint-ready protection with practical steps, safety tips, and expert guidance.

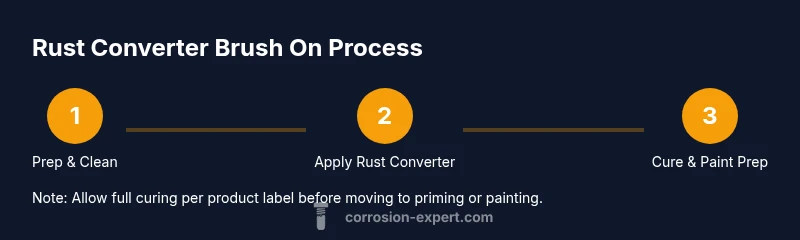
According to Corrosion Expert, a brush-on rust converter offers a convenient DIY path to stabilize rust and prep metal for painting. It stabilizes surface rust without grinding, and when used correctly you can recoat after the product cures. Clean and dry the area, apply a thin coat with a brush, wait for the converter to react (as directed), then wipe away excess and let it dry before priming.
What is rust converter brush on and when to use it
Rust converter brush-on products are designed to chemically convert iron oxide (rust) into a stable, paint-ready surface. They are especially useful for DIY projects where you want to stabilize rust quickly without heavy grinding. The brush-on format makes it easy to reach corners, grooves, and intricate details where power tools struggle. For beginners, this approach can be forgiving, but preparation remains essential. In this guide, we’ll focus on brush-on rust converters intended for metal surfaces and explain how to achieve reliable results across household projects.
According to Corrosion Expert, a brush-on rust converter is a practical option for homeowners who want a safe, indoor-friendly treatment. Corrosion Expert Analysis, 2026, notes that brush-on formulations are most effective when rust is dry and surface contamination is minimized. The technique avoids heavy grinding while still providing a stable, paint-ready surface. Remember, the goal is to convert rust in place and seal the metal against further corrosion. Absent proper preparation, even the best converter struggles to perform.
What makes brush-on products appealing is their ability to reach narrow channels and corners that are misbehaving under humidity or warmth. They are also a safer alternative for indoor projects where grinding dust would create ventilation challenges. When used with correct surface prep, brush-on rust converters can deliver a uniform, sealed surface that accepts primer and paint later on.
Safety and surface prep before applying rust converter brush on
Before you apply any rust converter, safety and prep are non-negotiable. PPE should include chemical-resistant gloves, eye protection, and a mask or respirator if you’re working in a confined space or with aggressive formulations. Ensure good ventilation and remove any food or drinks from the work area. Start by inspecting the metal for active flaking rust; if the surface is deeply pitted, you may need sanding or brushing to create a stable base. Clean the area with a degreaser or isopropyl alcohol to remove oils, dirt, and rust residues. Wipe dry with a lint-free cloth and let the surface air-dry completely. If you’re dealing with loose rust, use a wire brush or coarse sandpaper (grit around 120-220) to remove it gently. The goal is a clean, dry, and stable surface so the rust converter can bond effectively.
The Corrosion Expert team emphasizes ventilation and PPE, especially indoors. A poorly prepared surface can trap moisture or oils that hinder the chemical reaction. Take photos of the area before you start so you can compare results later and ensure consistent coverage across larger panels. Keep the temperature steady and avoid applying the product in extreme heat or cold, as curing times will shift accordingly. A clean, dry, and well-prepped substrate is the foundation of a durable finish.
For indoor projects, consider covering nearby areas with drop cloths and taping off edges to prevent overspray or accidental contact with skin or clothes. A quick test patch on a small area first can help you gauge the reaction and ensure the color change aligns with your expectations. After prep, revisit the workspace and confirm there are no residues that could interfere with the rust converter.” ,
Tools & Materials
- rust converter (brush-on formula)(Choose a product labeled for brush-on use; ensure it’s compatible with the metal type and indoor ventilation.)
- brush (0.5–2 inch wide, natural or synthetic)(For tight spots, use a small angled brush; wider brushes for flat surfaces.)
- wire brush or coarse sandpaper (grit 120–220)(Use to remove loose rust and create a stable base before applying converter.)
- cleaning solvent or degreaser(Use a solvent that dries without residues; follow manufacturer directions.)
- isopropyl alcohol or denatured alcohol(For final surface degreasing and prep just before application.)
- lint-free rags or clean shop towels(For wiping and drying; avoid fibers that leave residues.)
- gloves, eye protection, and a respirator or mask(Personal protective equipment is essential for chemical exposure.)
- plastic drop cloths or tarps(Protect surrounding areas from drips and spills.)
- painter’s tape(Seal edges and channels to keep the converter in place.)
Steps
Estimated time: 45-75 minutes
- 1
Inspect and plan
Identify rusted areas and assess whether the rust is flaky or stable. Take photos for reference and plan coverage areas so you don’t miss spots. This step sets expectations for the final painted finish.
Tip: Walk the area twice and note any crevices that may trap moisture. - 2
Degrease and clean
Remove oils, dirt, and contaminants with a degreaser or isopropyl alcohol. Wipe dry with a lint-free cloth and allow the surface to dry completely before proceeding.
Tip: Use a fresh cloth for each section to avoid spreading contaminants. - 3
Remove loose rust
Gently brush away loose rust and scale using a wire brush or coarse sandpaper. The goal is a stable surface that the converter can bond to without flakes.
Tip: Avoid aggressive sanding that could create deep pits; focus on smoothing protruding rust. - 4
Dry the surface
Ensure the area is completely dry. Moisture on the surface can dilute the reaction of the rust converter and delay curing.
Tip: If in doubt, wait 10–15 minutes for surface to air-dry before applying. - 5
Stir and prepare the converter
Open the rust converter and stir according to label directions. Some products require mixing or shaking to activate the formula.
Tip: Do not skim off the top layer; all components need to be mixed for consistent performance. - 6
Apply a thin coat
Using a brush, apply a thin, even coat over all rusted areas. Avoid pooling; multiple light coats often perform better than one heavy coat.
Tip: Work in small sections to maintain control and achieve uniform coverage. - 7
Let it react and cure
Allow the product to react and dry per the manufacturer’s instructions. Times vary; avoid re-wetting the surface until fully cured.
Tip: Keep the area free of dust and avoid touching the coating while it cures. - 8
Inspect and plan next steps
After curing, check for any remaining rust or uneven coverage. If needed, repeat treatment on stubborn spots, then plan for priming/painting.
Tip: Document results and store remaining product properly for future touch-ups.
Quick Answers
Can I use a brush-on rust converter indoors?
Yes, but ensure good ventilation and use PPE. Follow the label for ventilation guidelines and drying times to minimize exposure to fumes.
Yes, you can use it indoors as long as you have good ventilation and protective gear.
Will rust converter remove rust completely?
Rust converters don’t physically remove all rust; they chemically convert active rust to a stabilized compound and seal it. Heavy corrosion may still require physical removal or replacement of the metal.
No, it stabilizes rust rather than removing every bit of it.
How long does rust converter take to dry?
Drying times vary by product and conditions; typically you’ll see a tack-free period within 15–60 minutes, with full cure taking longer as per label. Check the product instructions for specifics.
Dry times vary; check the label, but plan for at least 15 minutes to set.
Can I paint over rust converter after it dries?
Yes. Once fully cured, you can apply primer and paint. For best results, follow the converter’s guidance on compatible primers.
Yes, you can prime and paint after it cures.
Is rust converter effective on galvanized metal?
Most rust converters target iron oxide on ferrous metals; galvanized steel may not respond as expected. Always check the product label for compatibility with galvanized surfaces.
Galvanized metal may not react the same; check the label first.
Watch Video
Quick Summary
- Stabilize rust with a brush-on converter before painting
- Prepare thoroughly: clean, degrease, and dry surface
- Apply thin coats and let each cure per label
- Protect surrounding areas and wear PPE
- Follow up with primer/paint after curing