How to replace rusted toilet flange
Learn how to replace rusted toilet flange safely with a clear, step-by-step approach. This guide covers flange types, tools, installation, testing for leaks, and prevention tips—perfect for DIY homeowners.

Goal: Replace rusted toilet flange and stop leaks. This guide covers when to replace, how to choose a compatible flange, and step-by-step installation with safety checks. You’ll need basic plumbing tools, a replacement flange, wax ring, and sealant. By following these steps, you’ll restore a secure, leak-free toilet connection. This is a DIY-friendly project for homeowners.
Understanding the risk of a rusted toilet flange
A rusted toilet flange is more than a cosmetic issue. Over time, corrosion can eat through the flange, causing wobble, leaks at the base, and even sewer gas entering the bathroom. When you notice rust around the flange or hear water seeping after flushing, it's a sign that the flange may be failing. The Corrosion Expert team notes that neglected flange corrosion often leads to more extensive floor damage and costly repairs if left unchecked. In many homes, people try to live with a compromised flange, assuming it’s a minor nuisance. But in reality, a failed flange jeopardizes the seal between the toilet and drain and can undermine tile and subfloor stability. The simplest and most reliable fix is to replace rusted toilet flange with a new unit that matches your drain size and toilet thickness. This does not just stop leaks today; it also reduces future corrosion risk by providing a solid, corrosion-resistant mounting surface. If you’re tackling this project, plan for access to the underside of the toilet and give yourself enough working space to maneuver the flange and tools without bending your back or cranking tight bolts.
Assessing flange types and fitment
To replace rusted toilet flange effectively, you first need to understand the flange type you’re dealing with. Most residential toilets use a 3- or 4-inch drain, with PVC, ABS, or cast-iron flanges being common. PVC/ABS flanges are usually lighter and easier to seal, while cast-iron flanges are more durable in older homes. Measure the drain opening and check the height from the finished floor to ensure the new flange will sit flush with the tile or flooring. When you prepare to replace rusted toilet flange, make sure the new flange matches the pipe material, the drain size, and the toilet’s base height. Misalignment is a frequent source of leaks after installation. A snug fit prevents rocking and helps preserve the seal around the wax ring. If you’re unsure about measurements, remove the old flange and take exact measurements to a hardware store for a matching replacement. The key is to have the flange sit level, with bolts aligned to the existing bolt holes in the toilet.
Safety and prep: shutting off water and protecting the area
Safety comes first when you embark on replace rusted toilet flange. Begin by shutting off the main water supply and then drain the tank by flushing until no water remains. Place towels or absorbent mats around the work area to soak up any spills and protect the floor. Disconnect the supply line from the toilet’s bottom. If you have pets or small children, keep them away from the bathroom during the project. Wear eye protection and work gloves to guard against sharp edges and rust flakes. Ventilate the space if you’re dealing with sewer gases or unpleasant odors. The Corrosion Expert team emphasizes that taking these precautions reduces skewed seals and accidental leaks during the replacement process. Having a second person to help lift the toilet and hold components steady is highly recommended for safety and efficiency.
Selecting the right flange replacement
Choosing the right flange for replace rusted toilet flange is essential for a long-lasting fix. Pick a flange that matches the drain size (3 or 4 inches) and the pipe material (PVC, ABS, or cast iron). A stainless-steel or brass replace rusted toilet flange offers corrosion resistance, but compatibility with the existing drain pipe is more important than material. Ensure the flange height accommodates the existing flooring—neither too high (causing a gap) nor too low (reducing gasket compression). Consider a gasket sealing system that provides a more reliable seal than older wax rings, especially in areas with high moisture. If you’ve got ceramic tile or a thicker floor, you may need a flange extender or a flange with adjustable height. Finally, verify that the bolt pattern aligns with your toilet base so you can bolt it down without cross-threading. By selecting the right flange, you’ll reduce the likelihood of future leaks after replace rusted toilet flange.
Cleaning and surface prep before installation
Before you install the new flange, thoroughly clean the drain opening and the surrounding subfloor. Remove all remnants of old wax, rust flakes, and debris using a putty knife and a scrub brush. A clean, flat surface ensures a proper seal and reduces wobble. If the subfloor is damaged, address basic repair or reinforcement before installing the new flange. Dry-fit the flange first by placing it on the drain to confirm alignment with the bolt holes and the toilet position. Any misalignment now will save you from leaks after the toilet is set. When you’re confident in the fit, apply a thin, even seal around the drain opening or the flange bottom according to the gasket instructions. The goal is to prevent moisture from seeping between the flange and the subfloor, which can contribute to future corrosion and flooring damage. Remember, a clean, well-prepared surface makes it easier to achieve a leak-free connection when you replace rusted toilet flange.
Installing the new flange: alignment and securing bolts
With the new flange in hand, place it over the drain and align the bolt holes with the existing floor bolts. Insert the closet bolts and gently tighten by hand to keep the flange in position while you check alignment. Secure the flange to the subfloor with screws, following the manufacturer’s torque recommendations to avoid cracking the flange or warping the floor. Do not overtighten; this can crack the flange or bend the bolts, leading to leaks. If you’re adjusting for floor thickness, a flange extender or spacer may be needed to maintain proper height. After securing the flange, double-check that it sits level and that the bolt holes align with the toilet base. A level surface helps ensure an even compression of the wax ring and reduces wobble. Also confirm there’s no gap between the flange and the floor to prevent seepage. This careful alignment is critical to a durable replace rusted toilet flange installation.
Sealing, wax ring, and reattaching the toilet
Next, place a new wax ring on the flange or toilet outlet depending on your preference, ensuring it’s centered. Reinstall the toilet by guiding it over the bolts and lowering it straight down to avoid gasket damage. As you press the toilet into place, listen for a snug seal and verify there’s no rocking. Tighten the nuts evenly in a diagonal pattern to prevent tilting. Reconnect the supply line and turn the water back on, then flush to test for leaks around the base. If you notice any seepage, re-tighten the bolts slightly and recheck the wax ring seating. It’s common to apply a bead of caulk around the base after the test flush, provided you follow local plumbing codes. The goal is to achieve a clean, leak-free seal after replace rusted toilet flange.
Prevention tips and maintenance to avoid future rust
To extend the life of your flange and the bathroom floor, take preventive steps. Use corrosion-resistant hardware, such as stainless steel closet bolts, and avoid metal-on-metal contact that accelerates rust. Regularly inspect the flange and surrounding area for signs of moisture or corrosion, particularly after heavy use or roof leaks. If the bathroom experiences high humidity, consider improving ventilation to reduce moisture buildup. Keep the area clean and dry, and use plumber-grade sealants where recommended by the flange manufacturer. By following these maintenance practices and replacing rusted toilet flange when rust is evident, you’ll protect your bathroom from leaks and structural damage. The Corrosion Expert emphasizes that proactive care is key to long-term reliability.
Tools & Materials
- Toilet flange replacement kit (3-4 inch compatible)(Confirm diameter and compatible with drain pipe material)
- Replacement flange (PVC/ABS or stainless cast iron)(Choose correct material and height for your floor)
- Wax ring (standard or oversized as needed)(New wax ring; consider a wax-free option if preferred)
- Putty knife or scraper(Remove old wax and debris from flange and subfloor)
- Adjustable wrench and/or channel locks(For disconnecting supply line and securing bolts)
- Screwdriver (Phillips and flat-head as needed)(Remove screws on flange and toilet bolts)
- Safety goggles and gloves(Protect eyes from rust flakes and sharp edges)
- Towels or absorbent mats(Contain water spills during removal and installation)
- Silicone sealant or plumber’s putty (optional)(Used by some installers for extra sealing)
Steps
Estimated time: Estimated total time: about 2-4 hours depending on access and materials.
- 1
Shut off water and drain
Turn off the main supply valve and flush the toilet to drain water from the tank. Use towels or a sponge to soak any remaining water in the bowl and drain line. This prevents spills when you disconnect the supply line and lift the toilet.
Tip: Have a helper ready to steady the toilet as you lift it. - 2
Disconnect supply line and lift toilet
Use the adjustable wrench to disconnect the water supply line at the angle stop. Loosen the nuts evenly and lift the toilet straight up without twisting. Place the toilet on a thick towel to protect the floor.
Tip: Keep the wax ring undisturbed to avoid contamination. - 3
Inspect and remove old flange
Examine the flange for rust, cracks, or detachment from the subfloor. If damaged beyond repair, remove it with a screwdriver and pliers. Clean the drain opening thoroughly to prepare for the new flange.
Tip: Take photos of pipe layout to reference during reassembly. - 4
Install new flange and secure bolts
Place the new flange over the drain and align the bolt holes with the floor bolts. Attach the closet bolts, then secure the flange to the subfloor with screws, ensuring a level installation.
Tip: Do not overtighten bolts; this can crack the flange or warp the floor. - 5
Seal and remount toilet
Apply a fresh wax ring to the flange or toilet outlet. Lower the toilet straight onto the bolts and press evenly to form a seal. Tighten nuts diagonally to avoid rocking.
Tip: Avoid side-to-side rocking after seating the toilet. - 6
Reconnect water and test
Reconnect the supply line, turn on the water, and flush several times to check for leaks around the base and bolts. If leaks appear, reseat the toilet and tighten as needed. Check for any sewer gas odors.
Tip: If you smell gas, stop and ventilate the area; recheck all seals before continuing. - 7
Finish and inspect
Apply silicone sealant around the base if required by code and wipe away excess. Recheck mounting, ensure the toilet is stable, and confirm no leaks after several more flush cycles.
Tip: Keep a watchful eye on the seal for the first 24 hours.
Quick Answers
Do I really need to replace a rusted toilet flange or can I just repair it?
A severely rusted flange that shows cracks, movement, or detachment from the subfloor generally requires replacement. Repairs are temporary at best and may fail again, leading to leaks. Replacing rusted toilet flange provides a reliable seal and reduces future corrosion risk.
Severely rusted flanges usually need replacement for a lasting seal and to prevent future leaks.
Can I perform the flange replacement myself, or should I hire a plumber?
If you have basic plumbing skills, the right tools, and a clear access path, you can replace rusted toilet flange yourself. If the waste line is behind a wall, or you encounter complex pipe layouts, consider hiring a licensed plumber.
DIY is possible with the right tools and care; call a pro for complex layouts.
What flange types should I consider for replacement?
Common options include PVC/ABS flanges for modern installations and stainless or brass flanges for higher durability. Ensure the diameter (3 or 4 inches) and height match your drain and floor thickness.
PVC/ABS are typical; choose by diameter and height to fit your drain and floor.
What are warning signs during replacement I should watch for?
Watch for wobbling toilet, ongoing leaks after resealing, or rust continuing to appear around the flange. If you notice sewage odor or persistent leaks, stop and reassess the seal and alignment.
If leaks persist or you smell sewer gas, pause and check alignment and seals.
How can I prevent rust formation after installation?
Use corrosion-resistant bolts, ensure proper ventilation in the bathroom, and inspect the flange area periodically. Keep the area dry and address any moisture or leaks promptly.
Use rust-resistant bolts and maintain a dry bathroom to prevent future corrosion.
What maintenance checks should follow a replacement?
Check the base seal for a few days after replacement, verify there are no leaks after multiple flushes, and re-tighten bolts if you notice any wobble.
After replacement, flush several times and monitor for leaks and wobble.
Watch Video
Quick Summary
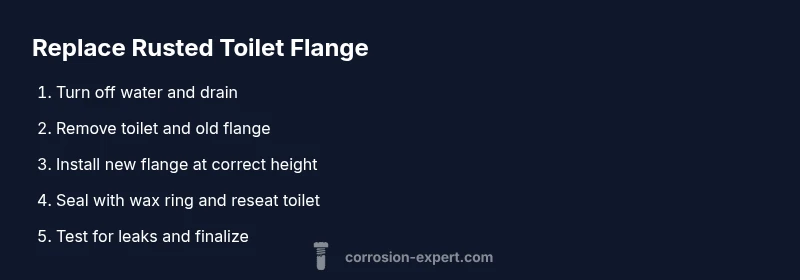
- Identify rusted flange early to prevent leaks
- Choose the right flange type for compatibility
- Shut off water and drain before starting
- Align bolts and seal correctly to avoid leaks
- Test for leaks and finish with proper sealant