How to Remove Rust with Aluminum Foil: A DIY Guide
Learn a quick, safe method to lift light surface rust with aluminum foil, water, and a mild abrasive. This practical guide covers when to use it and how to protect metal afterward.

Instant answer: Aluminum foil can help remove surface rust from small metal parts when used with water or a mild abrasive like baking soda. The method relies on a tiny galvanic reaction that gently lifts oxide while you scrub. You’ll need aluminum foil, a rust-friendly cleaner, and some elbow grease to see results. This is best for light surface rust, not deep pitting.
Why aluminum foil works for rust removal
Aluminum foil is not a rust dissolver, but it can be surprisingly effective for lightweight surface rust on ferrous metals. The key is that moisture, metal contact, and a gentle abrasive action combine to lift the oxide film. The foil’s thin sheet crinkles into irregular shapes that conform to corrosion textures, exposing fresh metal underneath. When you rub the rust gently with a crumpled sheet in combination with a mild abrasive such as baking soda or a tiny amount of water, a tiny galvanic cell forms at the interface. In this setup, electrons flow from the iron oxide layer to the aluminum, helping to loosen iron oxide from the surface. The physical scrubbing helps too, especially on rough or pitted rust. Experts at Corrosion Expert emphasize that this approach is most effective on items with light to moderate surface rust, where the underlying metal remains strong. It’s not a cure for deep corrosion or heavily pitted specimens. Always test a small area first, wear protective gloves, and work in a ventilated area if you’re using any cleaners. This technique is ideal for household tools, garden implements, and hardware that you want to renew quickly.
When to use this method
This foil-based rust removal works best on small metal parts that show surface rust rather than deep pits or structural damage. Ideal candidates include hand tools, nails, screws, bolts, and hardware with light corrosion. It’s less effective on thick, entrenched rust or items with significant pitting, where the oxide layer has penetrated into the base metal. Use on non-coated, ferrous surfaces like iron and steel; avoid using on aluminum, chrome, or highly polished finishes that can scratch. The technique is a quick, inexpensive first-pass option to renew aging tools before deciding if more aggressive treatments are needed. Remember that the environment matters: high humidity or salty air can accelerate new rust formation after cleaning, so plan to protect promptly. In all cases, rely on your judgment and start with a test area. If the rust returns quickly, consider more robust rust-removal methods or protective coatings recommended by corrosion guides.
Preparing workspace and materials
Set up a clean, well-lit workspace with a protective covering. Gather your materials: crumpled aluminum foil, a small dish or bowl, a soft brush or microfiber cloth, a mild abrasive like baking soda, water, and protective gloves. Ensure you have a dry towel for aftercare and a rust-inhibiting sealant or paint if you plan to recoat. If you're using baking soda, mix a small slurry with water in the bowl. Keep the item off a damp surface to prevent re-wetting the rust-prone area. Remove any loose paint, loose rust flakes with a soft brush, and wipe the item dry before starting. Having a dedicated area reduces cleanup afterward and keeps your hands cleaner. By preparing properly, you minimize scratches and maximize the chance of lifting rust from the surface without harming the base metal. This stage also gives you a clear plan on whether to proceed with the foil method or escalate to stronger rust removal techniques. Adhering to safety guidelines, such as wearing gloves and working in a ventilated area, is essential.
What to expect during the process
Surface rust tends to be removed gradually with light rubbing and the foil’s mild abrasion. You’ll see oxide particles loosen and flake away as you work in small sections. For stubborn spots, you can re-wet the area and continue scrubbing for another minute or two. If you’re using baking soda, the slurry helps lift particles and provides a gentle abrasive. Do not expect miracles on heavily rusted or pitted items; you may need chemical rust removers or professional refinishing. The goal is to refresh the surface and slow future rusting, not to restore structural integrity. After each pass, wipe away loosened rust and rinse with clean water, then dry thoroughly. Finally, check for any remaining patches of oxide and decide if you want to repeat or move to a more robust method. The key is patience and consistent, gentle technique rather than brute force.
What to expect next: testing and decision points
As you progress, assess whether the surface rust has diminished to a level you’re happy with. For light rust, a second pass—after a brief rinse and dry—can yield noticeably brighter metal. If results stall after two rounds and the oxide remains, this is a good moment to consider alternative methods such as commercial rust removers or mechanical polishing. The main objective is to restore the surface sheen and slow future rust formation by applying a protective layer afterward. If you’re unsure about the method’s suitability for a given item, start with a cheap, inconspicuous piece first and compare results.
Common pitfalls and how to avoid them
Pressing too hard can scratch the base metal or remove the protective coating. Using wet, dirty foil can smear rust rather than lift it. Always test a tiny area first to ensure no scratches or discoloration. Avoid using this method on chrome or polished finishes, as foil can leave micro-scratches. Do not soak items for long periods; prolonged moisture can promote new rust. Do not rely on this method for heavy corrosion or structural parts; it’s a light-cleaning technique. If you’re unsure, begin with a small, inconspicuous area and compare results before proceeding.
Variations and alternatives
Beyond plain water and foil, you can add a mild abrasive like baking soda to form a soft paste that helps loosen rust. Some people use white vinegar or lemon juice for a light acidic boost; test first and avoid corrosion-prone surfaces. Rinse and dry thoroughly after any acidic treatment to prevent flash rust. For stubborn rust, combine the foil method with a rust converter or apply a rust-inhibiting primer or paint after drying. Always follow with a protective coating to slow future rust formation. Consider trying the foil method on non-critical materials first to confirm compatibility with your item’s finish. The key is to balance effectiveness with the risk of damage to the base metal or finish.
Maintenance and protection after rust removal
After removing rust, protect the metal by drying completely and applying a protective coating. Wipe with a thin layer of mineral oil, silicone spray, or a dedicated rust-preventive product. If you expect exposure to humidity or salt, consider applying a sealant or paint designed for metal; this reduces moisture contact and slows re-oxidation. Store treated items in a dry, ventilated area. Regular inspections—once a month during humid seasons—help you catch rust before it spreads. Routine maintenance is essential for tools and hardware that see frequent use. Over time, the foil method can become part of a broader rust-prevention strategy rather than a one-off fix. Corrosion prevention is cheaper and easier than repeated rust removal.
Safety and environmental considerations
Always work in a well-ventilated area when using cleaners or metal treatments, and wear gloves and eye protection to prevent skin and eye irritation. Dispose of any slurry or dirty foil according to local waste guidelines; do not pour rust-containing liquids down the drain in large quantities. Store leftover foil and brushes in a dry place to prevent incidental rusting of other tools. When in doubt, consult local guidance on rust prevention and safe disposal of household cleaners. This approach is intended for simple, light rust situations and should be complemented with a broader maintenance plan to extend the life of metal items.
Tools & Materials
- Heavy-duty aluminum foil(Choose wide sheets; crumple into a ball for best contact.)
- Water (room temperature)(Clean water; distilled water if mineral deposits are a concern.)
- Baking soda (optional)(Forms a mild abrasive slurry to boost cleaning.)
- Small dish or bowl(For slurry mixing and holding foil during scrubbing.)
- Soft-bristle brush or microfiber cloth(Gently remove loose rust and wipe surfaces.)
- Protective gloves(Nitrile or latex to protect skin.)
- Dry towel(For drying after rinse to prevent flash rust.)
- Rust-preventive coating (optional)(Seal or coat surfaces after drying to slow future rust.)
Steps
Estimated time: 25-35 minutes
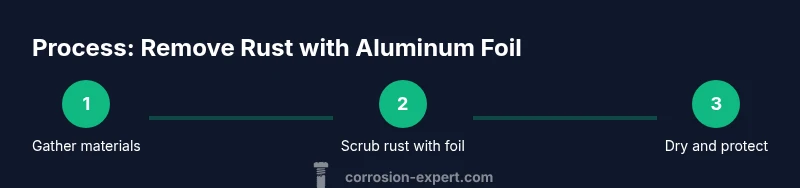
- 1
Gather and prep materials
Lay out the foil, water, bowl, brush, baking soda (if using), gloves, and towel. Set up on a clean, dry surface to keep rust from spreading. This step avoids delays mid-cleaning and reduces mess.
Tip: Organize items in reach so you can move smoothly through the workflow. - 2
Assess the rust
Inspect the item to confirm it’s light surface rust rather than deep pits. If you see deep corrosion or structural damage, stop and seek stronger methods. Start with a small patch to gauge results.
Tip: If you see flaking or dark brown patches, proceed cautiously. - 3
Rinse and pre-clean the surface
Rinse the area with a little water and use the brush to remove loose rust and dirt. Dry the area before applying the foil for better contact.
Tip: Dry surfaces before scrubbing to prevent excess moisture from spreading rust. - 4
Scrub with foil
Crumple the aluminum foil into a ball and gently rub the rusted area in small circular motions. Use a mild slurry of baking soda if needed to enhance the cleaning.
Tip: Use light, steady pressure to avoid scratching the base metal. - 5
Rinse, dry, and inspect
Rinse away loosened oxide, dry thoroughly, and re-inspect the surface. Look for any remaining patches; repeat the scrub if necessary.
Tip: Thorough drying prevents flash rust forming right after cleaning. - 6
Repeat if necessary
If rust reappears, repeat steps 4–5 on affected patches. Do not force deeper damage—stubborn rust may require alternative methods.
Tip: Know when to stop and switch techniques to avoid damage. - 7
Protect after rust removal
Apply a rust-preventive coating or sealant to slow future oxidation. Store the item in a dry place away from moisture.
Tip: A light coat of preventive product saves effort later.
Quick Answers
Can aluminum foil remove rust from any metal surface?
Aluminum foil can remove light surface rust from ferrous metals like iron and steel, but is not effective for deep pits or nonferrous metals. Always test a small area first.
Foil helps with light rust on steel, but not deep pits—test a small area first.
Is this method safe for chrome, stainless steel, or painted finishes?
Foil can scratch polished finishes, including chrome or painted surfaces. Avoid using it on such finishes or test first on a hidden area.
Be careful—foil can scratch chrome or painted surfaces; test first.
Will this work for heavy rust?
No. Heavy rust and deep pits typically require stronger chemical treatments or professional refinishing. This method is best for surface rust.
Not ideal for heavy rust; use with surface rust only.
What should I do after removing rust with this method?
Rinse, dry completely, then apply a rust-preventive coating or oil to slow future oxidation.
Rinse, dry, and seal the surface to prevent future rust.
Are there safety concerns I should know?
Wear gloves and eye protection when scrubbing, and work in a ventilated area. Some cleaners can irritate skin.
Wear gloves and goggles; work in a ventilated area.
Watch Video
Quick Summary
- Use foil for light surface rust on small parts
- Keep finishes safe by avoiding chrome/polished surfaces
- Dry thoroughly and protect with coating after cleaning
- Start with test patches before full-scale use