Rust Protection: DIY Guide for Home Metals
A thorough, step-by-step guide to protecting steel, iron, and other metals from rust using coatings, primers, rust converters, and regular maintenance. Practical tips for DIY enthusiasts and homeowners by Corrosion Expert.

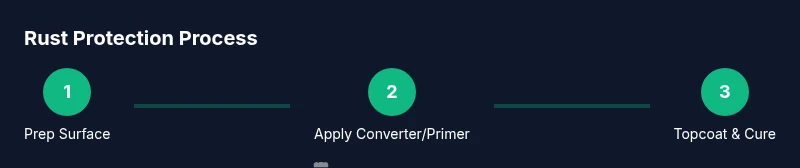
By the end of this guide, you will know how to shield metal surfaces from rust using prep, coatings, and routine maintenance. You’ll learn a practical, DIY-friendly process: surface prep, choosing a protective system, applying primers and paints, and creating a simple maintenance schedule to extend the life of tools, furniture, and structural metal.
What rust protection really means for your metal
Rust protection is more than painting a metal surface after it starts to corrode. It is a proactive set of practices designed to slow or halt the electrochemical processes that cause iron, steel, and other alloys to deteriorate when exposed to moisture, oxygen, and salts. For homeowners and DIY enthusiasts, embracing rust protection means choosing materials and methods that form durable barriers, resist wear, and require minimal maintenance over years. According to Corrosion Expert, rust protection starts with understanding how rust forms and the environment that accelerates it. The Corrosion Expert team found that different metals respond to protection strategies in distinct ways, but a common thread runs through all successful projects: address the rust at its source, not after it has spread. In practical terms, this means selecting a coating system that provides a stable, adherent film, preparing the surface to receive the coating, and planning for periodic inspection and reapplication. When you lock in surface preparation, primer compatibility, and proper curing, you create a shield that reduces water ingress, blocks oxygen access, and minimizes salt penetration. This approach applies whether you are protecting metal tools in a shed, a wrought-iron fence, cabinet hardware, or a structural steel beam in a workshop. Remember that rust protection is not one product but an integrated system consisting of surface prep, a functional barrier, and ongoing upkeep. In this guide, you will learn how to tailor that system to your specific metal type, environmental conditions, and budget, so you can achieve durable protection without overspending.
The science behind rust and how protection works
Rust is the result of electrochemical reactions at the metal surface. When moisture and oxygen meet iron or steel, an oxide layer forms, which initially protects the metal but soon becomes porous and flaky, allowing deeper corrosion to progress. Effective rust protection uses three core principles: (1) minimize water and salt access, (2) create a barrier that sticks well and resists abrasion, and (3) maintain the barrier through regular inspection and maintenance. Coatings designed for rust protection are formulated to be impermeable to water vapor, chemically resistant, and flexible enough to withstand temperature changes without cracking. Primers help the topcoat bond to bare metal and any rust-adapted substrates, while sealants fill tiny pinholes that could trap moisture. The goal is to slow the oxidation process so that rust progresses far more slowly, buying time for maintenance and reducing the likelihood of structural failure. The science also supports choosing products compatible with your metal type. For example, zinc-rich primers offer sacrificial protection for galvanic metals, while epoxy-based systems provide durable barriers for outdoor steel. By aligning your protection strategy with metal type and environment, you extend service life and reduce costly repairs.
Protective systems: coatings, primers, and sealants
A robust rust protection strategy uses a layered approach. The innermost layer is a properly chosen primer that adheres to the metal and, if possible, converts surface oxides to a stable base. For many DIY projects, a zinc-rich or iron phosphate primer provides good corrosion resistance and enhances topcoat adhesion. The topcoat, typically an epoxy, polyurethane, or hybrid coating, forms the primary barrier against moisture and oxygen. Some environments benefit from additional sealants or topcoats with UV resistance or flexible elastomeric properties to handle expansion and contraction. In outdoor or high-wear scenarios, consider a multi-coat system: degreaser, rust converter (if rust is still present but not deeply integrated), primer, and at least two thin topcoats. Metallic surfaces like galvanized steel or aluminum may require specialty coatings designed to maintain adhesion and prevent flash rusting. Always follow product data sheets for cure times and recoat windows, and ensure the system is compatible with your substrate. Regular inspections help catch wear and damage early, allowing timely touch-ups that prevent widespread rust.
Surface preparation: cleaning, rust removal, and conversion
Surface prep is the single most important step in rust protection. Begin by removing loose rust with a wire brush or grinder, then clean the surface with a degreasing cleaner to remove oils, waxes, and dirt. Rinse and dry completely before applying any coating. If you encounter stubborn rust, a rust converter can chemically transform it into a stable, paintable layer; this is especially useful on larger or irregularly shaped areas. Mechanical preparation ensures a clean, matte surface that promotes adhesion, while chemical conversion helps stabilize the substrate where mechanical work would be difficult. After treatment, lightly abrade the surface to promote bonding and remove any gloss from the converter. Finally, wipe down again to remove dust and solvents. Patience during curing is essential—skip or rush cure times will compromise the barrier and shorten protection.
Practical applications: steel, iron, tools, and outdoor metal
Different metal types respond to rust protection differently. Plain carbon steel tools benefit greatly from a durable epoxy or polyurethane topcoat with a cured film that resists abrasion. Cast iron parts, when prepped well, take well to primer and topcoat, with attention to any pitted areas where moisture may collect. Outdoor structural steel requires coatings that resist UV exposure, temperature cycling, and moisture. For wrought iron, a rust-inhibiting primer followed by a rust-protective finish can be effective if maintained. In all cases, avoid trapping moisture beneath coatings; ensure proper drainage, venting, and repair any rust pits before sealing.
Maintenance routines and long-term care
Rust protection is not a one-off task. Establish a simple maintenance schedule that includes seasonal inspections, cleaning to remove dust and grime, and reapplication of coatings as needed. The Corrosion Expert analysis shows that coatings degrade over time due to UV exposure, temperature changes, and physical wear; proactive maintenance extends service life and reduces the likelihood of deep rust. Start with a visual check for blistering, peeling, or chalking, then test adhesion on a small area. If the topcoat shows signs of wear, apply a fresh layer following the same preparation steps. Keep a log of maintenance dates so you can anticipate re-coating windows and avoid coverage gaps. In climates with high humidity or salt exposure, expect more frequent checks and earlier reapplication. The Corrosion Expert team recommends treating rust protection as a regular home maintenance task rather than a reaction to visible rust. Creating a simple calendar reminder for inspections, cleaning, and touch-ups can save time and money in the long run.
Common mistakes and best practices
Common mistakes include skipping surface prep, using the wrong primer for the substrate, selecting a topcoat that’s not compatible with the primer, and rushing curing times. Another frequent error is applying thick coats that trap moisture and peel sooner. Always follow the product data sheets for cure times, recoat windows, and ventilation requirements. Use thin, even coats rather than heavy builds; multiple thin coats provide better protection and durability. Always test compatibility on a small area before committing to the entire surface, especially on curved or irregular shapes where coatings may run or pool. Finally, store coatings in a cool, dry place and seal containers tightly to maintain their performance. By adhering to these best practices, you’ll maximize protection and extend the usefulness of metal items around the home.
Tools & Materials
- Wire brush(Medium stiffness for rust scale)
- Coarse sandpaper (60-120 grit)(For initial rust removal and matte finish)
- Degreasing cleaner(Oil and wax removal)
- Rust converter (optional for heavy rust)(Chemically stabilizes rust)
- Metal primer (zinc-rich or phosphating)(Promotes adhesion and corrosion resistance)
- Topcoat coating (epoxy/polyurethane)(Barrier against moisture and oxygen)
- Masking tape(Protect adjacent surfaces)
- Drop cloths or plastic sheeting(Contain mess and droppings)
- Nitrile gloves(Chemical resistance)
- Safety goggles(Eye protection)
- Respirator or good ventilation(Avoid inhaling fumes)
- Clean rags(Wipe and dry surfaces)
- Solvent or mineral spirits(For final wipe down)
Steps
Estimated time: 2-6 hours
- 1
Prepare the workspace and safety gear
Set up in a well-ventilated area, lay down drop cloths, and assemble PPE. Clear the surface of loose debris to prevent contamination of coatings.
Tip: Wear a respirator and gloves; fumes can be strong. - 2
Clean and degrease the metal
Use a degreaser to remove oils, waxes, and dirt. Rinse with clean water and dry thoroughly before proceeding.
Tip: Ensure the surface is completely dry; moisture cuts adhesion. - 3
Remove loose rust
Utilize a wire brush or sander to remove flaking rust. Target pits and edges where corrosion concentrates.
Tip: Work in a controlled pattern; avoid gouging the metal. - 4
Apply rust converter (if used)
If rust remains, apply a converter to stabilize the substrate and create a paintable surface.
Tip: Wait for the converter's active phase as directed by the product label. - 5
Prime the surface
Apply a compatible primer in a thin, even coat. Allow proper tack time before topcoating.
Tip: Match primer type to your topcoat for best adhesion. - 6
Apply the topcoat
Apply the first coat evenly; let it cure per the manufacturer’s recommendations, then apply a second coat for durability.
Tip: Thin coats cure evenly; avoid pooling at edges. - 7
Inspect and maintain
Check for signs of wear after curing and recoat as needed. Document maintenance dates for future reference.
Tip: Address chips and scratches promptly to prevent water ingress.
Quick Answers
What is rust protection and why is it important?
Rust protection creates a barrier that slows or stops corrosion on metal surfaces. Proper prep, correct product selection, and maintenance together prevent premature failure and extend the life of tools, furniture, and structural metal.
Rust protection adds a durable barrier that slows corrosion and extends metal life. Start with surface prep, then seal with a compatible coating and maintain it regularly.
Do I need rust converter or primer?
Rust converters stabilize existing rust and create a paintable surface, while primers improve adhesion and corrosion resistance for the topcoat. In most DIY projects, both play a role if rust is present.
Use a converter for unstable rust and a primer to improve adhesion and long-term protection.
How long does rust protection last?
Durability depends on environment, substrate, and maintenance. Outdoor or humid environments require more frequent inspections and touch-ups than indoor projects.
Durability varies with environment; outdoor use often needs more frequent maintenance.
Can I protect aluminum or stainless steel the same way?
Aluminum and stainless steel form different corrosion protection needs. They often require non-adhesive compatible coatings and corrosion inhibitors designed for their alloy chemistry.
Aluminum and stainless need specific coatings designed for their metals.
Is rust protection safe for indoor use?
Yes, when you choose low-odor, low-VOC coatings and ensure proper ventilation during application and curing.
Indoor-safe coatings exist; ventilate well during use.
How much does rust protection cost?
Costs vary by product selection, surface area, and whether rust converters are used. Expect a range based on materials and the size of the project; consult local suppliers for estimates.
Costs vary; get estimates from local suppliers based on your project size.
Should I hire a pro for rust protection?
For large or critical structural metal, professional application may be worthwhile to guarantee proper coating thickness and cure, but many DIY projects are feasible with careful prep and adherence to product instructions.
For big projects, consider a pro; for smaller jobs, DIY is doable with proper prep.
What environmental factors influence rust protection needs?
Humidity, salt exposure, and UV light critically affect coating performance and durability. Environments with high moisture or salt will demand more robust systems and maintenance.
Humidity and salt exposure increase protection needs; plan accordingly.
Watch Video
Quick Summary
- Prepare surfaces thoroughly before coating.
- Choose primers and topcoats compatible with the metal.
- Apply thin coats and allow proper curing.
- Inspect regularly and recoat as needed.