Rust Proofing Krown: DIY Underbody Protection Guide
Learn a practical, safe DIY method to apply rust proofing with the Krown system. This guide covers prep, application, and maintenance to protect your vehicle’s underbody from corrosion.

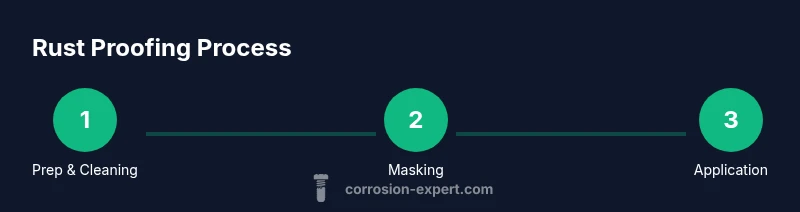
Goal: safely apply rust proofing using the Krown system and protect critical underbody areas with proper prep and ventilation. You will learn a proven workflow for rust proofing krown, including surface prep, masking, application, curing, and maintenance. This approach minimizes corrosion risk on the frame, axles, and doors. It emphasizes safety and clean, deburred surfaces.
What rust proofing with Krown is and why it matters
Rust is a quiet killer of metal components, especially on the undercarriage. Rust proofing with a Krown system offers a protective film that repels water, blocks oxygen, and slows corrosion at the source. For DIY enthusiasts and homeowners, learning a safe, repeatable workflow to apply rust proofing krown helps protect critical components such as frame rails, pinch welds, and suspension mounts. The goal is not to erase rust instantly, but to prevent new rust from starting and to slow the spread where it exists. A well-executed application provides months to years of protection in climates with heavy winter salt exposure. It also preserves resale value by delaying costly underbody repairs. A clean surface, proper masking, and controlled curing are essential to realize the full benefit. With the right environment and patience, you can achieve professional-like results without outsourcing. In this sense, rust proofing krown is a proactive maintenance task rather than a one-off fix. The Corrosion Expert team emphasizes safety, surface prep, and adherence to manufacturer directions for best results. According to Corrosion Expert, starting with a clean, dry surface and following a controlled cure yields the best adhesion.
How the Krown system works to stop corrosion
Every rust-proofing treatment relies on three things: surface cleanliness, film formation, and residual protection. The Krown system uses a liquid corrosion inhibitor that is absorbed into the top layers of metal and left to cure into a flexible film. When used correctly, this film forms a protective barrier that displaces moisture and blocks oxygen. For DIYers, this means understanding that the product does not 'paint' the metal like a traditional coating; it creates microscopic, long-lasting protection that is renewed with subsequent applications. In climates with winter road salt, consistent reapplication according to the manufacturer’s guidelines can maintain protection. The process is most effective on non-porous surfaces like steel frames, exhaust hangers, and suspension mounts; it’s less beneficial on epoxy-coated panels where manufacturer seals exist. By focusing on seam lines, welds, and hidden cavities, you reduce hidden corrosion. The overall approach is to create a sacrificial shield that arrests rust progression rather than attempting to remove existing rust after it has penetrated through.
Safety, prep, and planning before you start
Safety comes first in any rust proofing project. Ensure adequate ventilation, work in a shaded, temperate area, and keep pets and children away from the workspace. Wear a NIOSH-approved respirator or equivalent, chemical-resistant gloves, and eye protection. Before you begin, inspect the vehicle’s underbody for loose rust, sharp edges, or damaged coatings. Plan masking zones to prevent overspray on brake lines, sensors, and electrical connectors. Identify the sections that are most prone to moisture entrapment, like pinch welds and frame joints, so you can allocate extra coating where it matters. A clean, dry, and well-lit workspace reduces the risk of missed spots and rework. If you’re unsure, consult the product’s safety data sheet and follow manufacturer recommendations for curing times and ambient conditions.
Surface prep and cleaning for best results
Preparing the surface is the foundation of durable rust proofing. Begin by rinsing off visible dirt and salt, then wash with a degreasing cleaner to remove oil and grease. Use a stiff brush to dislodge heavy grime from crevices, and rinse again to carry away loosened debris. After washing, dry the surface thoroughly with absorbent towels or a blower. Moisture trapped in seams or cavities will compromise adhesion, so pay extra attention to wheel wells, frame rails, and suspension points. For stubborn rust or flaky coatings, lightly abrade the area with a non-industrial pad to create a fresh, clean surface for the inhibitor to bond. Finally, recheck for any remaining damp spots and allow full drying before application. A dry, clean surface is essential for the Krown film to form correctly and to maximize long-term protection.
Masking, protecting adjacent surfaces, and environmental controls
Mask off areas that should not receive coating, including rubber hoses, brake components, electrical connectors, and fasteners. Use painter’s tape and plastic sheeting to cover nearby components and to minimize overspray. Maintain a clutter-free workspace, with good lighting and a clear path for movement around the vehicle. If you’re working outside, pick a shaded area with low humidity and stable temperature to prevent premature drying or film misformation. Ensure you have a prepared waste area for rags and used PPE and a container to collect any runoff. Proper masking prevents costly cleanup later and helps you apply a uniform coat to all high-risk zones.
Applying rust-proofing: best practices and techniques
Apply the Krown system in thin, even coats, moving methodically from the center of each panel outward to avoid pooling. Concentrate on high-risk zones like frame rails, suspension mounts, weld seams, and inside door sills. Use the product’s recommended application method—spray, pour, or brush—according to the kit you’re using, maintaining a steady hand and a consistent distance to control thickness. Work in small sections, allowing each pass to dry slightly before the next coat if the climate is warm or humid. Avoid excessive buildup in crevices where moisture can trap. If you notice runs or drips, address them promptly by light re-spraying or wiping with a clean rag. After coating, recheck all critical areas and confirm that the film is forming evenly across the surface. A thorough, patient approach yields a durable, long-wearing protective layer.
Post-application care and maintenance to extend protection
Let the coating cure according to manufacturer guidance, keeping the vehicle in a dry, ventilated space during the initial cure period. After curing, perform a light inspection for missed spots and reapply as needed, following your climate’s exposure patterns. Regular checks—especially after winter or heavy road-salt exposure—help maintain protection. If moisture or salt residue is noticed, clean and reapply to maintain the barrier. Document the date of application for future maintenance planning. With periodic maintenance, you can extend the life of the rust-proofing layer and reduce future underbody corrosion risks.
Long-term maintenance and common issues
Over time, elements like salt, mud, and road grime may compromise film integrity in seams or tight corners. Reapply as part of your seasonal maintenance plan, especially before prolonged exposure to harsh weather. If you encounter poor adhesion or peeling, verify that the surface was thoroughly cleaned and dried before application. Surface preparation is often the key to long-term success. If you have heavy corrosion or structural rust, seek professional guidance to determine whether treatment should be intensified or paired with additional protective measures. The goal is to maintain a protective barrier and minimize new rust formation over time.
Tools & Materials
- PPE kit (gloves, goggles, respirator)(Protect skin and lungs; ensure respirator fits properly)
- Cleaning solvent or degreaser(Use to remove oil, grease, and road grime)
- Pressure washer or hose with nozzle(Rinse away dirt and salt before degreasing)
- Plastic sheeting and masking tape(Protect surrounding components from overspray)
- Rags and lint-free cloths(Dry surfaces and wipe away excess product)
- Krown rust-proofing system (brand-specific solution)(Follow manufacturer directions; ensure proper ventilation)
- Application tools (spray nozzle or brush)(Use per kit instructions; maintain consistent coating thickness)
- Drying/air source (optional)(Hair dryer or blower can help dry crevices quickly)
Steps
Estimated time: Total time: 3-5 hours
- 1
Prepare workspace and vehicle
Clear the workspace, gather tools, and ensure good ventilation. Park on a level surface and chock wheels to prevent movement. Remove loose dirt and check for any obvious hazards before starting.
Tip: Lay out items in order of use to minimize back-and-forth trips. - 2
Wash and dry underbody
Rinse the undercarriage, then scrub with a degreaser to remove oil and road grime. Rinse again and dry thoroughly with clean towels or a blower to prevent moisture entrapment.
Tip: Pay extra attention to frame rails and wheel wells where salt accumulates. - 3
Mask off sensitive areas
Apply masking tape and plastic sheeting to protect hoses, sensors, brake lines, and electrical connectors. Create a clean boundary so coatings don’t contact unintended parts.
Tip: Double-check seals around openings to avoid overspray into critical components. - 4
Apply rust-proofing solution
Apply in thin, even coats over target areas, starting at the center and moving outward. Allow minimal drying between passes if climate is dry, or wait per kit directions for a final pass.
Tip: Work in small sections to prevent pooling in crevices. - 5
Address seams and cavities
Give extra attention to weld seams, pinch welds, and hidden cavities where moisture collects. Apply additional coats if necessary to ensure coverage.
Tip: Do not overcoat; excessive thickness can trap moisture and extend cure time. - 6
Cure and inspect
Let the coating cure in a dry space as recommended. Inspect after curing for missed spots and perform a touch-up if needed.
Tip: Record application date to plan future reapplications.
Quick Answers
Is rust proofing with Krown suitable for older vehicles?
Yes, rust-proofing can be beneficial on older vehicles, especially in exposed areas. It may slow further corrosion and buy you time, but assess existing rust and ensure surfaces are sound before applying.
Yes. It can help older vehicles if you prepare and apply correctly, but inspect existing rust first.
How long does rust proofing last with Krown?
Durability depends on climate, exposure, and maintenance. Reapplication should follow the product guidelines and inspection results rather than fixed timelines.
It lasts varying amounts of time depending on exposure; reapply as needed based on condition.
Can I apply Krown rust-proofing myself or should I hire a pro?
It is feasible for a careful DIYer with the right PPE, masking, and workspace. Some vehicles or complex areas may benefit from professional application.
You can try it yourself if you’re careful and have the right gear, otherwise hire a pro for tricky spots.
Are there surfaces where rust proofing should not be applied?
Avoid coating on freshly painted or sealed surfaces that trap moisture, and avoid electronics and delicate sensors where coatings can interfere.
Don’t coat freshly painted or sealed areas, and keep coatings away from electronics.
What maintenance after application is recommended?
Regularly inspect underbody areas, clean off salt residue after winter, and reapply as needed per climate exposure and product guidance.
Check the coating periodically, clean off salt, and reapply when necessary.
Watch Video
Quick Summary
- Prepare thoroughly before applying.
- Keep surfaces clean and dry for best adhesion.
- Mask off sensitive areas to prevent overspray.
- Apply in thin, even layers and follow cure times.
- Schedule regular inspections and reapplications as needed.