Paint Rust Oleum: A Complete DIY Rust-Protection Guide
Prep, prime, and apply Rust-Oleum on rusted metal. This step-by-step guide covers surface cleaning, product choices, safety, and curing for lasting protection.

With paint rust oleum, you can restore rusty metal to a durable, protected finish. The secret is thorough surface prep, choosing the right Rust-Oleum products (converter, primer, and topcoat), and proper application conditions. This guide walks you through a step-by-step process to prep, coat, and cure for long-lasting protection.
Introduction to painting rust with Rust-Oleum
If you plan to paint rust oleum on metal, the secret is a clean, dry surface and a plan to prevent future corrosion. The Rust-Oleum brand is trusted for practical, long-lasting protection if you follow manufacturer guidelines and surface-prep best practices. In this section, we'll set expectations: you can achieve a smooth, corrosion-resistant finish on bicycles, gates, or furniture with the right preparation and coatings. The initial preparation step is the most critical: removing loose rust, cleaning oil and grease, and ensuring a dry surface before applying any primer. By committing to a thorough prep, you dramatically improve rust resistance and paint adhesion, reducing the chance of premature peeling or flaking.
Surface prep: cleaning and removing loose rust
Begin by removing loose rust with a wire brush or steel wool. Follow with light sanding (80-120 grit) to create a key for the primer. Wipe away all dust with a damp cloth and then dry completely. If staining or heavy rust remains, consider a rust converter for remaining areas, but always follow the product’s instructions. Proper prep reduces corrosion pathways and helps Rust-Oleum achieve a strong bond.
Rust converters vs. rust removers: which to use
Rust removers chemically remove surface rust, while converters transform rust into a stable, paintable layer. For light to moderate rust, a converter can save time; for heavy corrosion, you’ll likely need mechanical removal first. Always test a small area first, and ensure the metal is dry before applying any coating. Using a converter can be particularly effective when you’re working on outdoor hardware that can’t be fully stripped.
Primers and paints: choosing the Rust-Oleum products
Rust-Oleum offers a range of products for rusted metal, including rust converters, primers, and topcoats designed for exterior and interior use. Start with a rust converter if you have lingering rust; then apply a compatible primer to improve adhesion. Finish with the chosen Rust-Oleum topcoat for durability. Reading product labels is crucial to ensure the coating system is compatible across layers and that cure times match environmental conditions.
Step-by-step application: from primer to topcoat
Apply a thin, even coat to avoid runs. Allow adequate dry time between coats per product directions, typically several hours. Use long, smooth strokes with a high-quality brush or a small-nap roller for flat surfaces; spray coatings require steady, even passes. Two coats of topcoat provide the best protection against moisture and wear. Always finish with a final inspection to check for thin spots or drips.
Drying, curing, and maintenance
Drying times depend on temperature, humidity, and product. Maintain good ventilation and avoid touching surfaces until fully cured. For outdoor projects, expect 24-48 hours for initial cure; full hardness may take up to a week. Periodic maintenance—touch-up as needed and reseal joints—extends the life of the coating and keeps rust at bay.
Outdoor vs indoor use and ventilation
Ventilation is crucial when applying solvent-based coatings. Use a respirator, gloves, and eye protection, and work in a well-ventilated area. Outdoors, ensure shade and avoid direct sun on hot days to reduce flash-drying. Indoor projects require masking of nearby areas and proper drying space to prevent fumes from accumulating.
Common mistakes and troubleshooting
Avoid applying paint too soon after cleaning; moisture trapped under the coating causes blistering. Over-thinning can weaken the finish and reduce coverage. If you see peeling, reconsider surface prep, allow extra drying time, or switch to a primer designed for rusted metal. Troubleshooting is often about ensuring dryness and compatibility of all layers.
Tools & Materials
- Wire brush or steel wool(Use 120-grit or finer for final prep)
- 80-120 grit sandpaper(To create a key for primer)
- Rust converter (optional)(For remaining rust before painting)
- Rust-Oleum primer(Compatibility with topcoat)
- Rust-Oleum rust-preventive paint/topcoat(Exterior-grade if outdoors)
- Paint tray and brushes or roller(Choose appropriate nap for surface)
- Painter’s tape and drop cloths(Protect nearby areas)
- Degreaser or acetone wipe(Remove oil/grease before painting)
- Dust mask or respirator(Ventilation is essential)
- Gloves and eye protection(Safety first)
- Clean rags and water(For cleanup and drying)
- Weather-appropriate shelter or workspace(Protect from rain and dew)
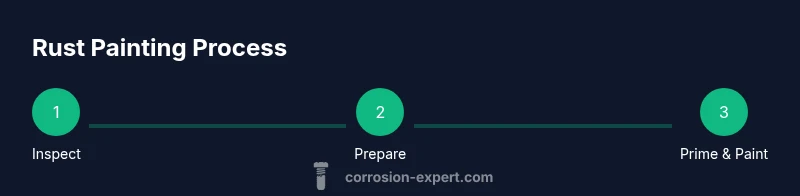
Steps
Estimated time: Active: 3-4 hours; Cure: 24-48 hours depending on product and conditions
- 1
Assess the surface and safety
Inspect the project, identify rust severity, and plan your coating system. This helps you choose whether to convert, prime, or topcoat first.
Tip: Wear a respirator when working with solvents. - 2
Remove loose rust with a wire brush
Brush thoroughly to lift loose rust and scale. This creates a clean base for adhesion.
Tip: Work from edges toward the center to avoid missing spots. - 3
Degrease and clean the surface
Wipe with a degreaser or acetone, then rinse and dry completely. Any oil film can ruin adhesion.
Tip: Ensure the area is fully dry before continuing. - 4
Apply rust converter if needed
Apply a converter to transform remaining rust into a paintable layer. Follow the product's dry time before priming.
Tip: Test a small area first to confirm compatibility. - 5
Lightly scuff to create a key
Use 120-grit sandpaper to create a micro-roughness that helps the primer stick.
Tip: Do not gouge; aim for uniform texture. - 6
Apply Rust-Oleum primer
Coat evenly and allow proper cure between coats. Primer improves adhesion and uniform color.
Tip: Apply a thin, tack-free layer. - 7
Apply first coat of Rust-Oleum paint
Spray or brush in even strokes, maintaining a wet edge to avoid lap marks.
Tip: Maintain consistent distance if spray painting. - 8
Apply second coat for coverage
Let the first coat dry, then apply a second coat to ensure uniform color and protection.
Tip: Do not rush the cure between coats. - 9
Cure and inspect
Allow full cure per product instructions and inspect for missed spots or thin areas.
Tip: Address any issues with a quick touch-up.
Quick Answers
Is Rust-Oleum suitable for outdoor metal?
Yes, many Rust-Oleum products are designed for exterior metal use, but always check the product label for temperature and humidity guidelines.
Yes, many Rust-Oleum products are designed for outdoor metal use, but check the label for conditions.
Can I paint over bare rust?
Bare rust should be removed or converted before painting. If lots of rust remains, adhesion may fail. Use a converter or mechanical removal first.
Don't paint over bare rust; remove or convert first for best adhesion.
How long does it take to dry between coats?
Dry times vary by product and environment; typically a few hours between coats. Always follow the label directions for recoat windows.
Dry times depend on the product; usually a few hours between coats.
Do I need a primer if I use a Rust-Oleum primer able product?
If you use a full Rust-Oleum system, primer is recommended to maximize adhesion and color uniformity. Skipping primer may reduce durability.
Use primer for better adhesion and color, unless the product says otherwise.
Is it safe to use indoors?
Solvent-based paints emit fumes; provide ventilation and wear a respirator. Some water-based Rust-Oleum products are safer for indoor use.
Ventilate well and wear protection; indoor use is possible with water-based formulas.
Watch Video
Quick Summary
- Thorough surface prep drives adhesion and durability
- Choose the right Rust-Oleum system for your project
- Follow cure times to avoid premature failure
- Ventilate and protect surrounding areas during application
- Inspect for thin spots and touch up as needed