Can You Rust-Proof a Car Yourself? A Comprehensive DIY Guide
Learn how to rust-proof a car yourself with step-by-step prep, coating options, and maintenance tips. This educational guide from Corrosion Expert covers safety, planning, and best practices for DIY rust prevention on common trouble spots.

Yes, you can rust proof a car yourself with careful planning, proper safety gear, and the right coatings. This quick answer addresses can you rust proof a car yourself by outlining practical steps. You’ll learn how to assess rust, prepare surfaces, apply a rust converter where needed, and finish with a protective coating. The approach works well for mild surface rust and typical trouble spots like the underbody, wheel wells, and pinch welds—always prioritize safety and local regulations.
Feasibility, safety, and planning
If you’re considering can you rust proof a car yourself, the short answer is: with proper prep, materials, and patience, you can manage mild rust protection as a DIY project. According to Corrosion Expert, many car owners successfully extend the life of vulnerable metal by following a structured plan rather than rushing into spray-on remedies. The key is to start with an honest assessment of the car’s condition, set realistic goals, and prioritize areas most prone to moisture and road salt, such as underbody panels, wheel wells, pinch welds, and door sills. This early phase also helps you decide whether a DIY approach fits your climate, schedule, and skill level. By mapping zones and setting a budget, you minimize waste and avoid over-application, which can trap moisture and worsen corrosion in hidden pockets.
Understanding rust forms on vehicles
Rust on cars isn’t a single problem; it manifests as surface rust, scale, flash rust, and sometimes deeper penetration. Surface rust affects the paint and top metal layer, while scale indicates more aggressive oxide formation that can spread if left unchecked. Deeper corrosion can create pinholes or structural weakness, especially at seams, welds, and edges where water stagnates. In winter or coastal climates, salt accelerates progression. For DIY rust proofing, distinguish between removable rust that you can scrub away and rust that has penetrated the metal; the latter may require repair before coating. This understanding helps you tailor your work plan and choose the right products for each zone.
Surface prep and rust treatment options
Surface prep is where many DIY rust projects succeed or fail. Start with a thorough wash to remove dirt, oil, and road grime, then dry completely. Degrease the area and use a wire brush or drill-mounted cup brush to remove loose oxide. Wipe with a solvent to ensure a clean surface. For remaining rust, apply a rust converter according to the manufacturer’s instructions; it chemically stabilizes oxidation so primers can bond. If metal is flaky, pitted, or perforated, consider repair or panel replacement before applying coatings. The goal is a solid, dry substrate with sound metal free of active corrosion.
Coatings: inhibitors, primers, undercoatings
After prepping, choose a coating system designed for automotive steel. A rust-inhibiting primer creates a solid bond for the topcoat and provides a barrier against moisture. For non-visible areas, an automotive undercoating or rust sealant sprayed or brushed onto the underside, arches, and frame rails offers robust protection against moisture and salt. If you want a paintable finish, pair your primer with a compatible topcoat and UV protection. In harsher climates, a dedicated underbody coating often outperforms standard paints due to its thicker, more flexible film. Always adhere to cure times, ventilation requirements, and recoat windows to ensure long-term protection.
Planning the DIY workflow: map the job
Plan zone by zone rather than tackling the whole car at once. Start with the most exposed areas (undercarriage, pinch welds) and reserve mild weather days for application. Create a simple, zone-by-zone checklist and set realistic timelines. Photograph each step to document coverage and identify any missed spots. A disciplined approach minimizes over-spray and ensures even protection. Corrosion Expert recommends cataloging each area and confirming surface readiness before coating, especially in challenging joints and corners where rust tends to accumulate.
Safety, ventilation, and environmental considerations
Automotive coatings release fumes; work in a well-ventilated area and wear a respirator rated for organic vapors. Use gloves, eye protection, and long sleeves to minimize skin contact with solvents. Keep ignition sources away and store paints and thinners in approved containers. After each session, clean tools thoroughly and ventilate the space to reduce chemical exposure. If you’re working in a garage, use a temporary exhaust setup or fans to maintain air quality and ensure a safer workspace. Always follow local regulations for disposal of chemicals and waste.
Cost, time, and maintenance expectations
DIY rust prevention is both time- and cost-sensitive. Expect several hours of hands-on work, spread over a couple of sessions, depending on climate and the amount of rust to address. Material costs vary by product quality and coverage area, so plan for rust converter, primers, coatings, and basic tools. Regular maintenance—inspecting treated areas, touching up chips, and reapplying protective layers after harsh seasons—extends the life of the protection. Corrosion Expert analysis, 2026, shows that early action yields better long-term results and helps you balance cost with durability.
Authoritative sources and next steps
For safety guidelines and regulatory considerations, consult authoritative sources such as OSHA and EPA resources, and for vehicle care standards, refer to NHTSA materials. University extensions and government publications on corrosion prevention provide deeper technical context. This article combines practical, field-tested techniques with safety-conscious practices, and it reflects the Corrosion Expert approach to responsible DIY rust prevention. Always assess your local climate and vehicle condition before starting, and consider a professional consultation if heavy corrosion or structural issues are present.
Tools & Materials
- Nitrile gloves(chemical-resistant; choose 4–6 mil thickness for durability)
- Respirator mask (organic vapor cartridges)(P100 or equivalent; ensure a proper fit)
- Safety goggles(Wraparound style preferred; splash protection)
- Wire brush set(Cup brush for drill and hand brush for detail work)
- Sandpaper (80–120 grit)(For dulling glossy surfaces and smoothing edges)
- Degreaser/cleaner(Automotive-grade degreaser or acetone/isolvent)
- Rust converter(Chemical stabilizer for remaining rust)
- Automotive primer (rust-inhibiting)(Choose compatible primer for your topcoat)
- Undercoating or rust sealant(Thick film coating for exposed underside areas)
- Masking tape and plastic sheeting(Protect adjacent components and paintwork)
- Rags and lint-free wipes(Clean, dry, and residue-free surfaces)
- Spray gun or aerosol cans (optional)(For even coating on larger surfaces)
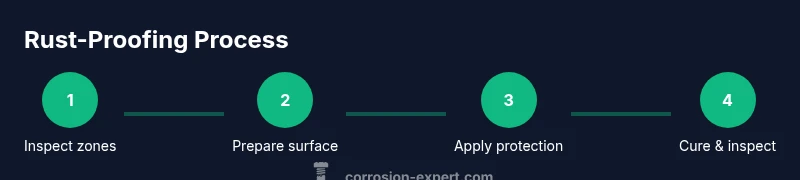
Steps
Estimated time: Total time: 3-5 hours
- 1
Inspect and map rust hotspots
Begin by walking the car’s exterior and underside to identify rust hotspots. Note areas with bubbling paint, flaky rust, or holes. Create a zone map documenting each location and its severity to guide your work sequence.
Tip: Take clear photos for reference; map zones from easiest to hardest to reach. - 2
Mask off non-target areas
Thorough masking protects trim, rubber seals, and exposed electrical connections. Use masking tape and plastic sheeting to cover areas you don’t plan to coat. This reduces overspray and keeps the finish clean.
Tip: Use multiple thin masks rather than one thick sheet to prevent lifting during coating. - 3
Clean and degrease surfaces
Wash away dirt, oil, and road grime with a degreaser. Rinse and dry completely. The surface must be dry and free of contaminants for optimal adhesion.
Tip: Ensure no moisture pockets remain in hidden crevices. - 4
Remove loose rust with mechanical prep
Lightly abrade loose rust with a wire brush until the surface looks uniform and the underlying metal shows through. Wipe away dust with a clean solvent-soaked cloth.
Tip: Do not gouge the metal; aim for clean, stable edges. - 5
Apply rust converter to active rust
Apply rust converter to areas with active rust per product instructions. Allow it to cure before proceeding to primer. This stabilizes the rust and reduces future spread.
Tip: Ventilate well during curing and avoid applying on windy days that blow dust into the coating. - 6
Prime and seal the prepared surfaces
Once converter is cured, apply a rust-inhibiting primer to the exposed metal. Let it dry completely before applying an undercoating or topcoat.
Tip: Follow recoat windows; rushing can compromise adhesion. - 7
Apply protective coating
Brush or spray an automotive undercoating or rust sealant on exposed undersides, wheel wells, and pinch welds. Apply multiple thin coats as recommended, allowing each to cure.
Tip: Maintain even coverage and avoid pooling at low spots. - 8
Cure, inspect, and test
Allow the coating to cure fully according to product guidelines. Inspect all zones for gaps or misses and touch up as needed. Plan a follow-up inspection after a few months.
Tip: Document the cure times and keep a maintenance log. - 9
Ongoing maintenance and refresh
Schedule seasonal checks, especially after winter or heavy rain. Recoat areas showing wear or stone chips to maintain protection. This proactive approach minimizes future rust progression.
Tip: Set reminders in your calendar for periodic checks.
Quick Answers
Can I rust-proof a car myself, or should I hire a professional?
DIY rust-proofing is feasible for mild surface rust with the right tools and safety precautions. For structural rust, complex frame damage, or deep corrosion, a professional assessment is advised.
DIY rust-proofing is fine for mild areas if you follow safety guidelines; for structural rust, seek professional help.
What areas should I treat first on a typical vehicle?
Start with the underbody, pinch welds, wheel wells, and door sills—areas prone to water exposure and salt. Prioritize zones where moisture tends to pool and paint has thinned.
Begin with the areas that see the most water exposure, like under the car and around the wheels.
Are there products I should avoid for DIY rust protection?
Avoid using household paints or spray products not rated for automotive use. Stick to automotive rust converters, primers, and undercoatings designed for metal and outdoor environments.
Use products specifically made for cars; avoid generic paints that may not adhere well outdoors.
Will rust proofing fix existing deep rust on structural parts?
No, deep rust on structural parts often requires professional repair before any protective coatings are effective. DIY steps are best for mild surface rust only.
Deep rust usually needs professional repair before DIY protection can work well.
How long does DIY rust protection last?
Durability depends on climate, exposure, and maintenance. A well-applied system can last several years, with periodic inspection and touch-ups as needed.
A good system can last a few years, but you’ll want to inspect and refresh it after harsh seasons.
Does rust protection affect my car warranty?
It can, depending on the warranty terms. Use approved products and methods, keep receipts, and ensure you don’t void any coverage by applying non-approved coatings.
Check your warranty, use approved methods, and keep records to avoid issues.
Watch Video
Quick Summary
- Assess rust carefully before acting
- Use rust converters only on rust you can’t remove mechanically
- Choose a compatible primer and undercoating system
- Follow cure times and safety guidelines for best results
- The Corrosion Expert team recommends proactive, staged DIY rust prevention for mild cases