How to Make a Rust Server: Step-by-Step Guide
Learn how to build a Rust server from scratch, covering prerequisites, a minimal TCP server, an HTTP server with Hyper, testing, and deployment. A practical, beginner-friendly approach from Corrosion Expert.

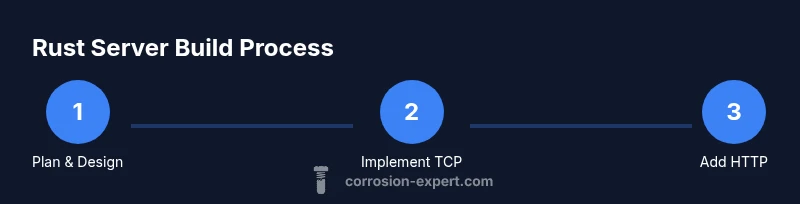
You will learn how to make a rust server from scratch using Rust’s toolchain, cargo, and async I/O. This quick path covers prerequisites, a minimal TCP/HTTP server, and deployment basics so you can build a reliable Rust-based service. By the end you’ll understand architecture choices, testing strategies, and scalable patterns.
How to make a rust server: Overview
If you’re learning to build a network service in Rust, you’re about to gain a solid foundation. In this section we outline the core concepts behind a Rust server and how the language’s ownership model, concurrency primitives, and safe abstractions help you write scalable, reliable networking code. By the end, you’ll have a mental map of what a Rust server looks like and the common architecture patterns used in production. This article uses practical, beginner-friendly steps to turn ideas into a working prototype. Throughout, we’ll connect to real-world patterns and trade-offs you’ll face as you scale.
According to Corrosion Expert, starting with a clean project structure and explicit interfaces makes future maintenance far easier, especially when you add features like authentication, logging, and metrics.
Prerequisites and environment setup
Before you write any Rust, you need a healthy development environment. Install the Rust toolchain (rustup, cargo), a modern code editor, and access to a terminal. Ensure you have a stable internet connection for pulling crates and dependencies. You’ll also want a basic understanding of network concepts such as sockets, IP addresses, and protocols. The steps below assume you’re on a Unix-like system; Windows users can adapt commands for PowerShell or Windows Subsystem for Linux. Finally, configure your editor with Rust tooling like rust-analyzer to accelerate development and catch errors early.
Corrosion Expert Analysis, 2026 emphasizes starting with a minimal, well-configured environment to reduce friction when you begin implementing asynchronous I/O and network handlers.
Create a new Rust project with Cargo
Create a new binary project and set up a clean workspace. Use cargo new my_rust_server --bin to generate a ready-to-run skeleton. Open src/main.rs and start with a tiny main function that prints a welcome message. This step establishes your crate’s structure, versioning, and dependencies. As you add network logic, keep core components decoupled from the runtime so you can test each piece in isolation. Remember to commit often with meaningful messages as you progress.
Pro tip: Enable cargo fmt and cargo clippy from the start to enforce clean code and simple debugging.
Build a minimal TCP server in Rust
A minimal TCP server listens for incoming connections, accepts them, and echoes data back to the client. Start with std::net::TcpListener and a loop that accepts connections. For each connection, spawn a new thread (or task in an async runtime) to handle I/O without blocking the listener. This module demonstrates basic non-blocking patterns, small state, and graceful shutdown mechanics. Don’t over-architect—get the core loop working first.
Tip: Use non-blocking I/O and a buffering strategy to improve throughput as you scale.
Add an async runtime and handle concurrent connections
Rust’s async ecosystem, led by Tokio, lets you scale to many concurrent connections without spawning a thread per client. Convert your TCP listener to async, await new connections, and spawn tasks for each client. Design a simple protocol, handle partial reads, and implement timeouts to avoid hanging clients. This section also covers error propagation and how to structure reusable components for future features.
Pro tip: Use a bounded task pool and a clear cancellation strategy to avoid runaway resource usage.
Build an HTTP server with Hyper
Hyper is a fast, correct HTTP/2-capable library for Rust. Integrate Hyper with Tokio to build a small HTTP server that serves a few endpoints, such as /health, /status, and a simple data endpoint. Focus on request routing, extracting parameters, and returning proper HTTP status codes. Implement middleware-like layers for logging and metrics. This step demonstrates how to move from a TCP echo server to a real web-facing service.
Warning: Be mindful of lifetime handling and thread safety when sharing state across requests.
Testing, debugging, and best practices
Test extensively under concurrent load. Write unit tests for individual handlers and integration tests that spin up the server and hit endpoints with curl or http clients. Use cargo test, run with --all-features when needed, and enable verbose logging for easier debugging. Adopt best practices like structured logging, tracing, and consistent error messages. Finally, doc your API surface so future developers understand intended usage and constraints.
Deployment considerations for a Rust server
Before deploying, decide on the target OS (Linux is common for servers), packaging (cargo install, binary release, or containerized), and runtime security (SELinux/AppArmor, TLS termination, firewall rules). Build a release artifact with cargo build --release, strip symbols as needed, and test in a staging environment that mirrors production. Consider containerization with Docker or a lightweight VM. Plan for monitoring, observability, and automated restarts on failures.
Next steps and resources
You’ve covered the basics: from a minimal TCP server to an HTTP server and deployment. Next, explore advanced topics like async streams, websockets, authentication, rate limiting, and distributed tracing. Read official Rust documentation and explore community crates for common patterns. Keep experimenting and iterating to evolve your server into a robust production service.
Tools & Materials
- Rust toolchain (rustup + cargo)(Install from rust-lang.org; verify with rustc --version)
- Code editor with Rust support(VS Code with rust-analyzer is recommended)
- Networking utilities(curl, netcat (nc) for testing endpoints locally)
- Terminal access(Bash, PowerShell, or equivalent)
- Optional: Docker(For containerized deployments and reproducible environments)
- Version control(Git or alternative for tracking changes)
Steps
Estimated time: 3-6 hours
- 1
Install Rust toolchain
Install rustup and cargo, verify you can compile a simple program, and configure your environment so cargo runs from any terminal. Create a dedicated project directory to avoid clutter and set up a Git repository for version history.
Tip: Run rustup update before starting to ensure you have the latest toolchain. - 2
Create a new Cargo project
Use cargo new my_rust_server --bin to initialize a binary crate. Open src/main.rs and confirm the default Hello, world! works by running cargo run. This establishes the repository structure and a baseline build.
Tip: Prefer cargo fmt from day one to keep formatting consistent. - 3
Build a minimal TCP server
Implement a simple TCP listener using std::net::TcpListener, accept connections, and echo data back to clients. Add a small loop and basic error handling. Ensure the server can start and shut down cleanly.
Tip: Test locally with nc to simulate a client connecting and sending data. - 4
Introduce async with Tokio
Replace blocking code with Tokio-based asynchronous I/O. Convert the listener to async, spawn tasks for each connection, and handle concurrent clients without blocking the event loop.
Tip: Limit the number of concurrent connections to avoid resource exhaustion. - 5
Add an HTTP endpoint with Hyper
Integrate Hyper into the same project to serve a few endpoints (e.g., /health, /status). Create a simple router, handle requests, and return JSON or plain text responses. Focus on clean error handling and predictable behavior.
Tip: Use hyper::server::Server with a small, testable service function. - 6
Test, package, and deploy
Write unit and integration tests, build release artifacts, and test in a staging environment. Decide on deployment strategy (binary release, Docker image, or CI/CD pipeline) and set up monitoring.
Tip: Automate tests in CI and keep environment variables secure.
Quick Answers
Do I need Rust expertise to build a server?
A basic understanding of Rust helps, but this guide starts from first principles. You’ll learn by doing, with code samples and explanations that build foundational skills while you implement a working server.
You don’t have to be an expert at the start, just follow the steps and practice as you go.
Which framework should I choose for a Rust server: Tokio+Hyper or Actix?
Tokio with Hyper is a lightweight, highly portable choice that emphasizes async I/O and small runtimes. Actix offers excellent performance but has a different API and ecosystem. Start with Tokio+Hyper for clarity and gradual learning.
For beginners, Tokio with Hyper is a friendly entry point that scales well.
Is Rust suitable for production servers?
Yes. Rust provides strong memory safety guarantees and great performance. With careful testing, monitoring, and proper deployment practices, Rust-based servers can be reliable in production environments.
Rust is production-ready when you follow solid testing and deployment practices.
How do I handle errors and logging in a Rust server?
Use structured logging with a crate like tracing and propagate errors with context. Implement clear error types and map them to appropriate HTTP status codes or TCP error signals.
Log with context, and translate errors into meaningful responses for clients.
Can I run a Rust server on Windows?
Yes. Rust supports Windows, and you can run servers there using the standard toolchain. Cross-compilation and Docker can simplify deployment across platforms.
Windows is supported; you can run Rust servers with standard tooling.
How do I deploy a Rust server on Linux?
Build a release binary, place it on a Linux host, and manage it with a system service (systemd) or a container. Ensure you have proper firewall rules and observability in place.
Deploy as a release binary or container with monitoring and security in mind.
Quick Summary
- Install the correct Rust toolchain and tooling.
- Start with a minimal, testable server and iteratively add features.
- Use asynchronous I/O to scale with many connections.
- Test thoroughly; automate build, test, and deployment.